|
home |
back |
BANDIT2 | page 6 |

| < | 1 | 2 | 3 | 4 | 5 | 6 | 7 | 8 | 9 | 10 | 11 | 12 | 13 | 14 | 15 | 16 | 17 | 18 | > |
17 September 2010
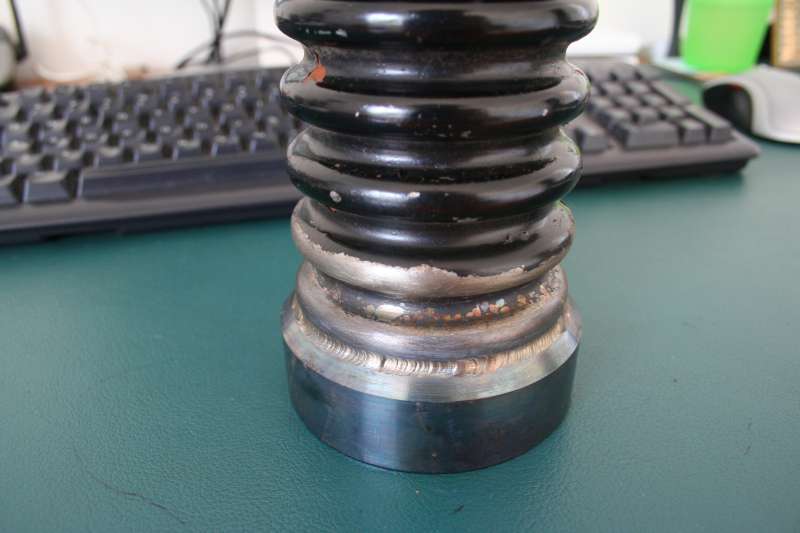
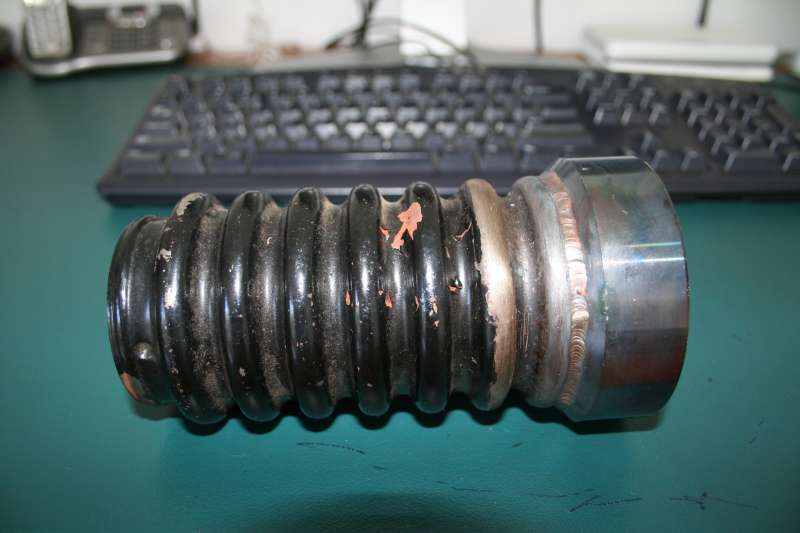
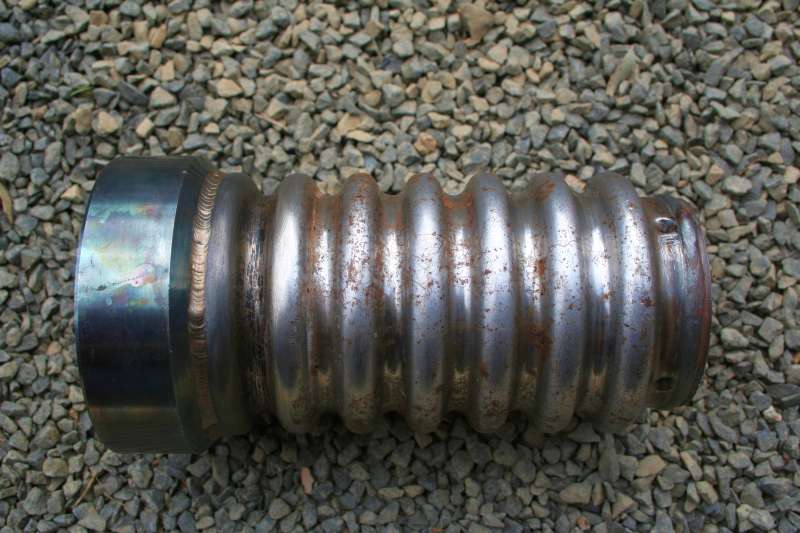
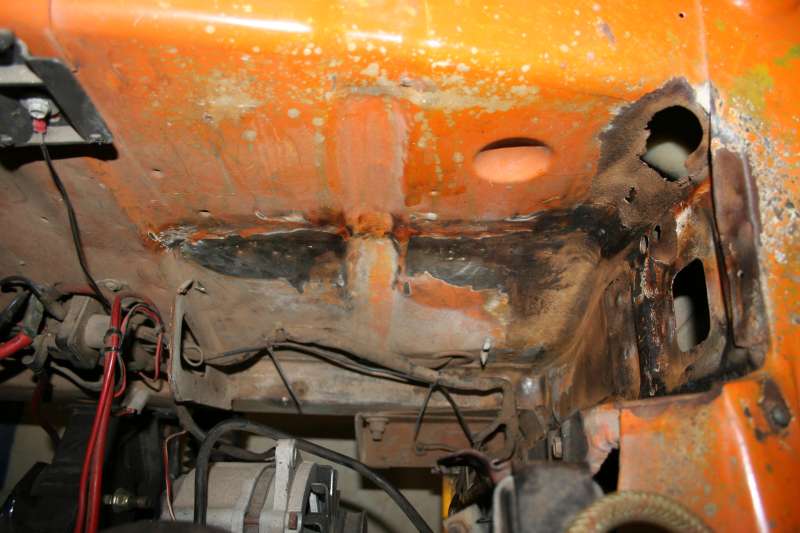
I dropped the boss at Bomaderry Welding and they had it done by lunchtime. And for $25 its a bloody good job. I'm really happy with it. Next job is to clean it up and get some paint on it. I want to get it blasted and powdercoated, but that's probably a bit excessive.
 |
 |
 |
23 September 2010
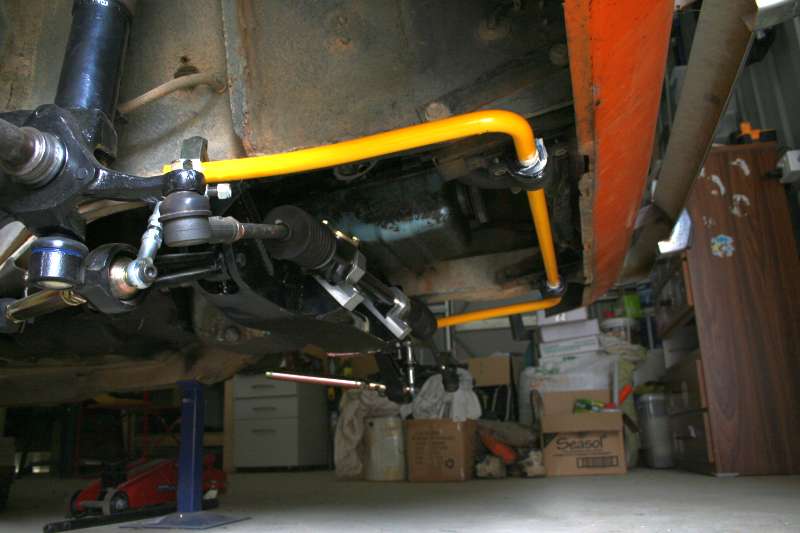
A couple of weeks back I got Signature Swaybars in Sydney to make me up a bar that would fit with the drop links. The guy turned it around real quick and even brought it down this way. I'm just hoping I haven't made it too wide. I added a bit of width just to make sure it cleared the chassis rails, but I might have added too much. We'll see once we get the wheels back on.
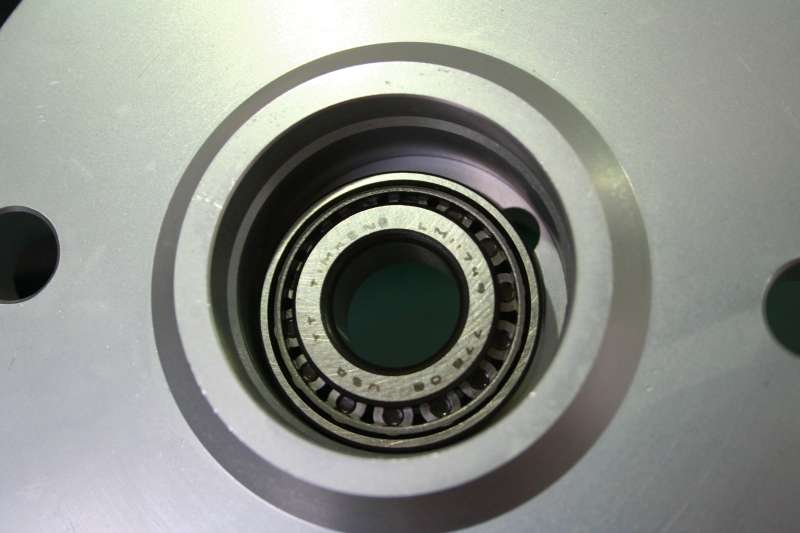
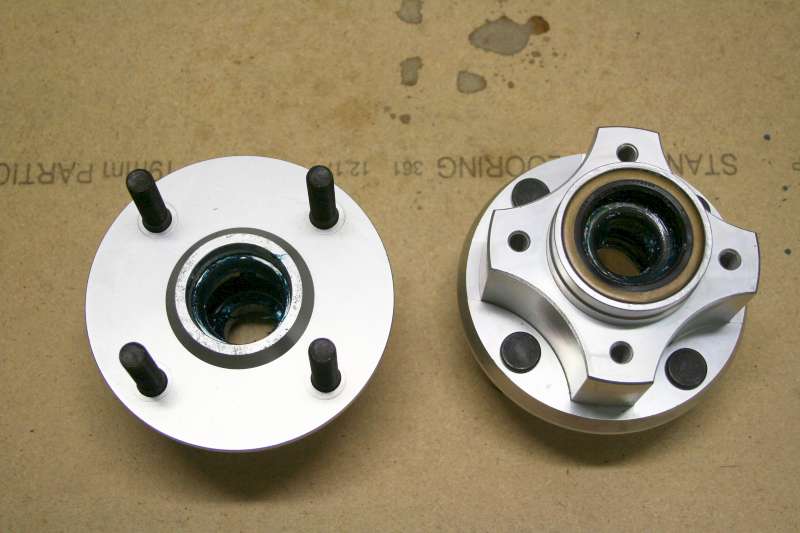
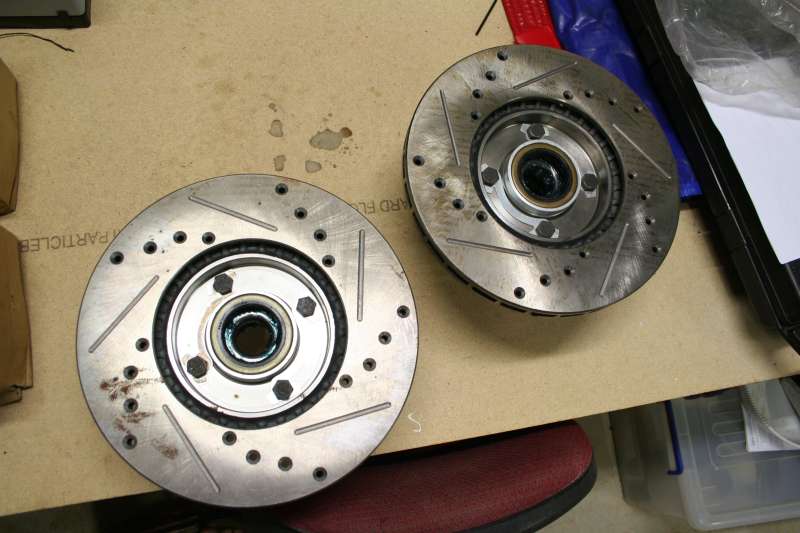
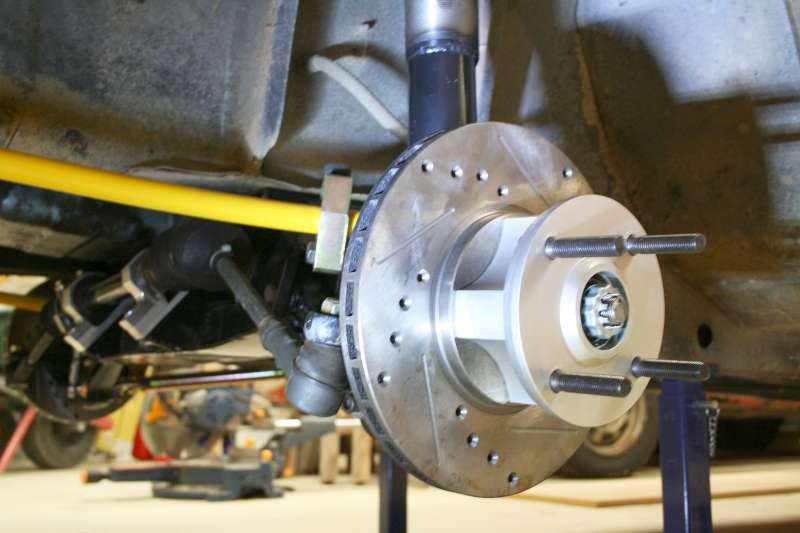
Speaking of getting the wheels on. What a pain in the butt these alloy hubs have been. First we couldn't work out what inner bearings were needed. But found those. And then they aparently take standard 2L outer bearings. So I finally got to South Nowra and got a couple of them. Of course they don't fit either. Back to south nowra and the guy at the bearing place had a measure and couldn't find anything that would fit. So he suggested going to an engineering place and getting a sleeve made to fit the hub so the std bearing will go in. Looks like that will be the plan of attack.
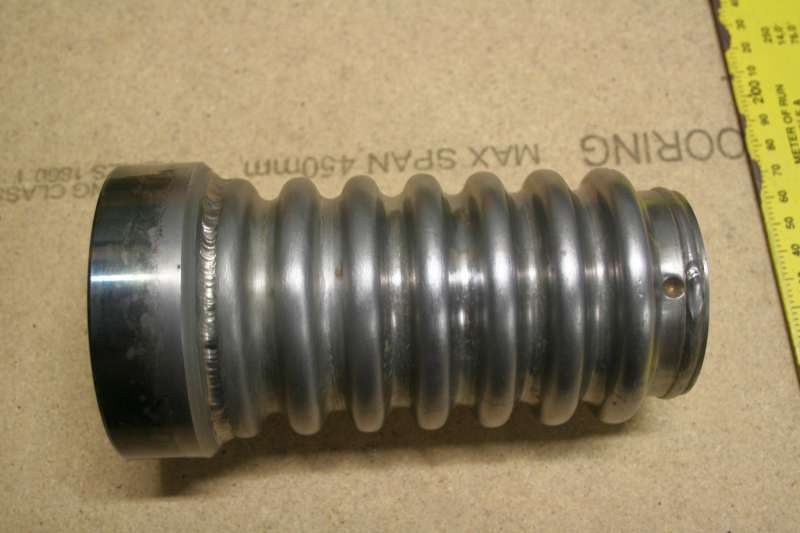
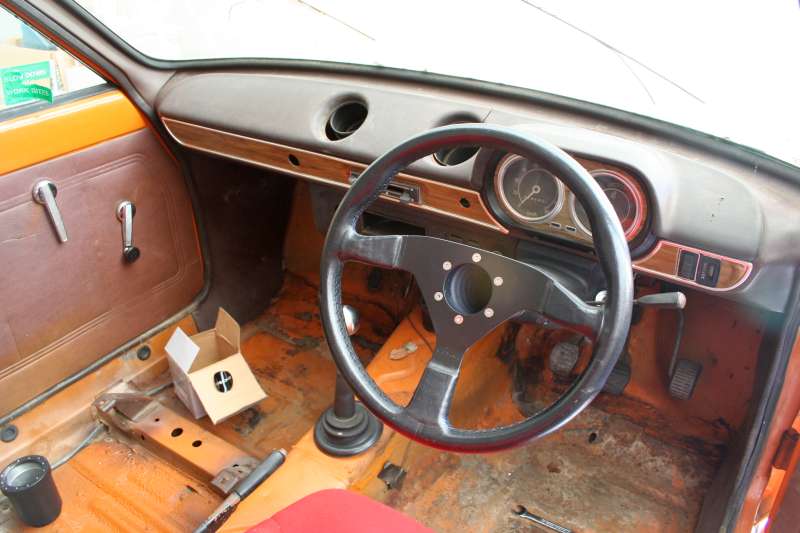
Back to the steering wheel boss. I stripped the paint off it but there was still a lot of rust on it. I'd heard you could soak it in vinegar and that would get rid of the rust. So I gave that a go. After 2 days I pulled it out. It looked like it hadn't worked, but when I wiped it down and cleaned it up it was beaut. Gave it lick of etch primer to stop the rust coming back, and then it'll be paint.
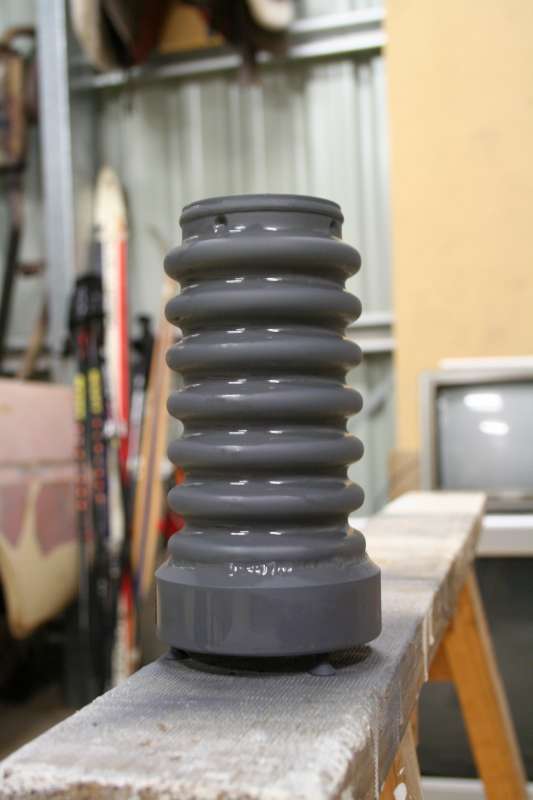
edit-24-Sep-2010 - Got some paint on the boss today. Perfect warm weather for it too. 3 coats should be enough. I'm going to try and find time to put it on with the wheel tonight.
 |
 |
 |
 |
 |
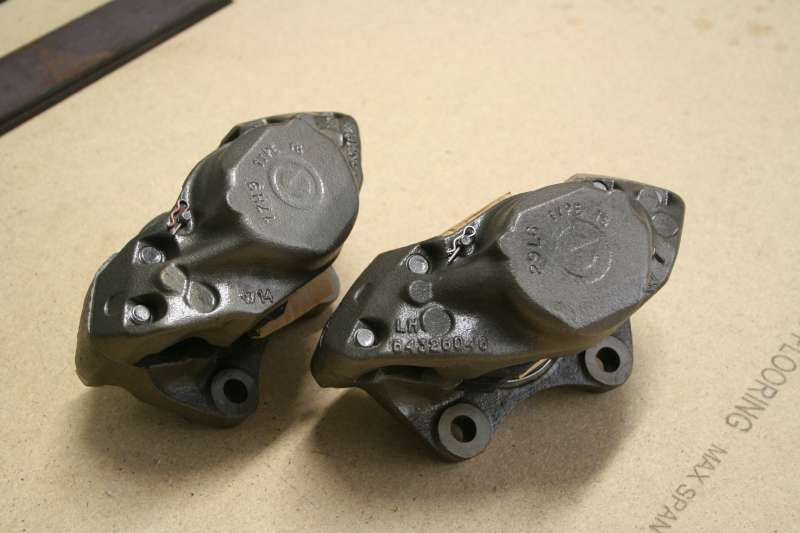
 |
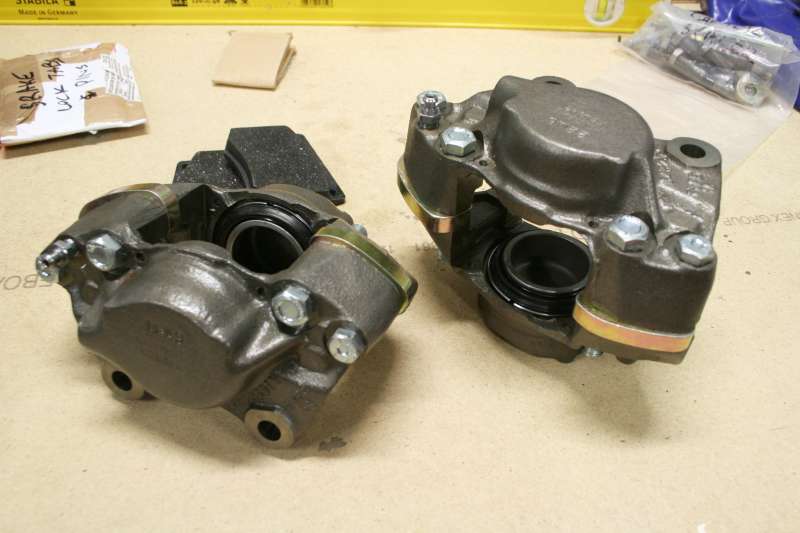
30 September 2010
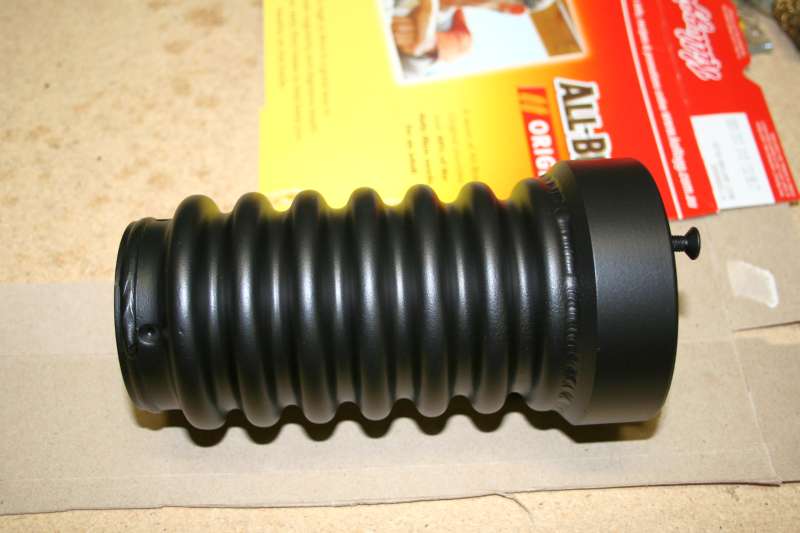
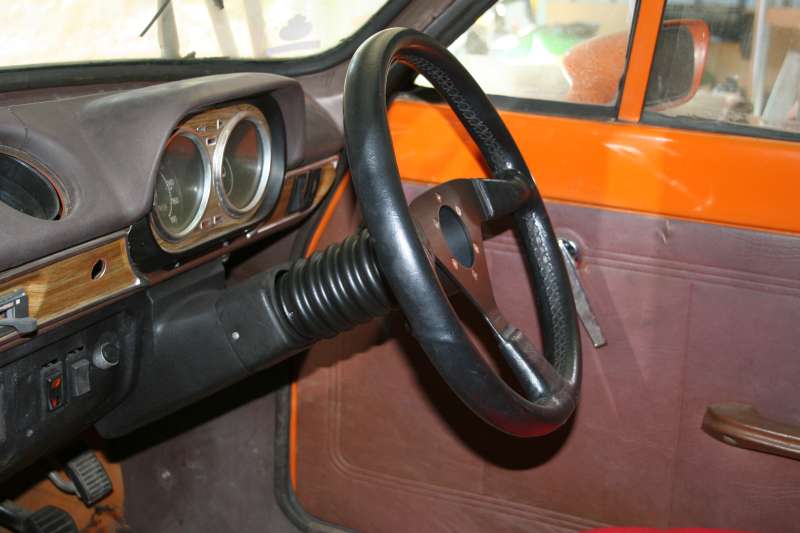
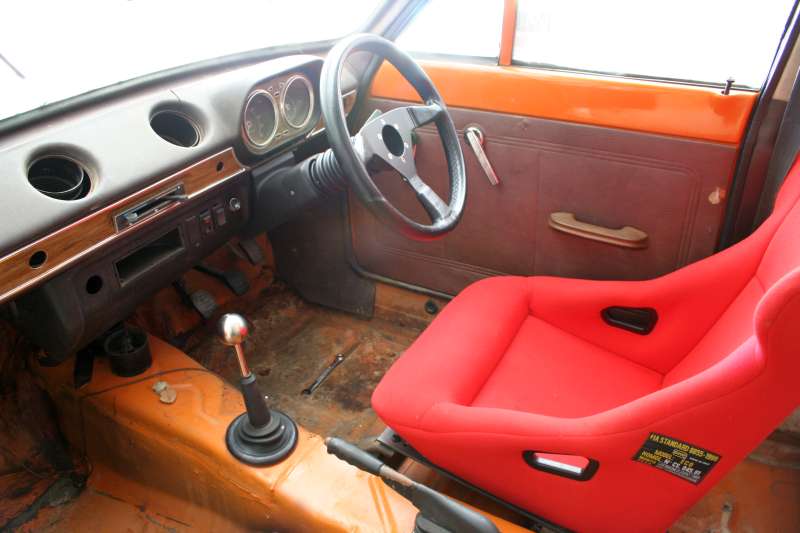
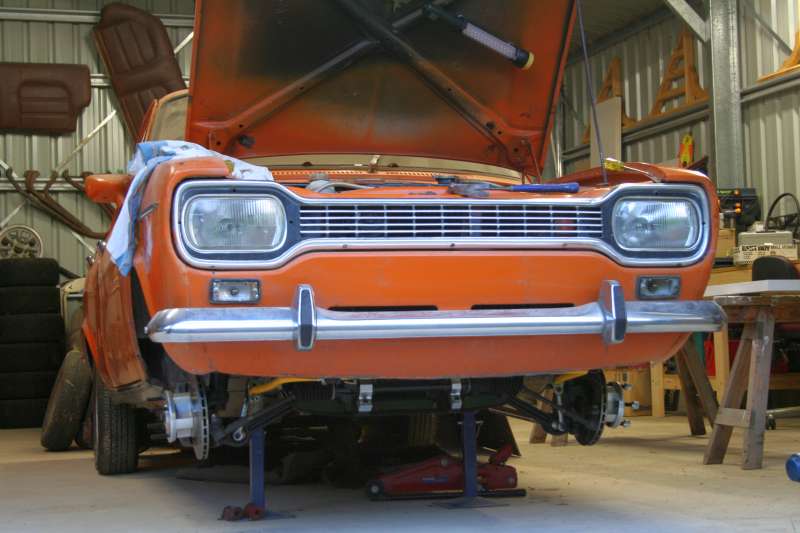
Good old eBay showed up some reconditioned calipers that went for cheaper than I could buy new pistons for, so I grabbed them. Then of course Drew rang and said Rob had a pair off a set of struts he had and only wanted $20 for them. Ah well. You can never have enough spare parts :) I also finished off and then mounted the steering wheel. I was about to put it on but noticed there was some scratches on the wheel, so I had to tidy that up a bit first. Its looking pretty cool in there now with the seat, wheel and gear knob. Now to get the front wheels back on.
 |
 |
 |
 |
8 November 2010
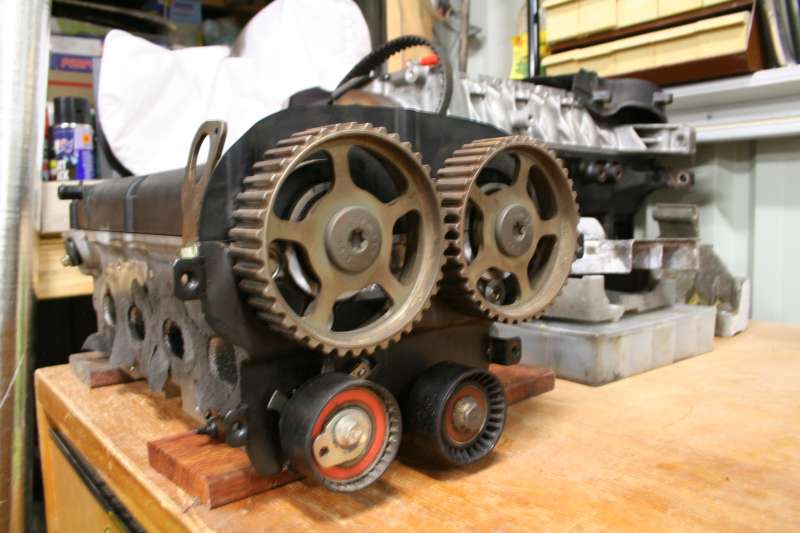
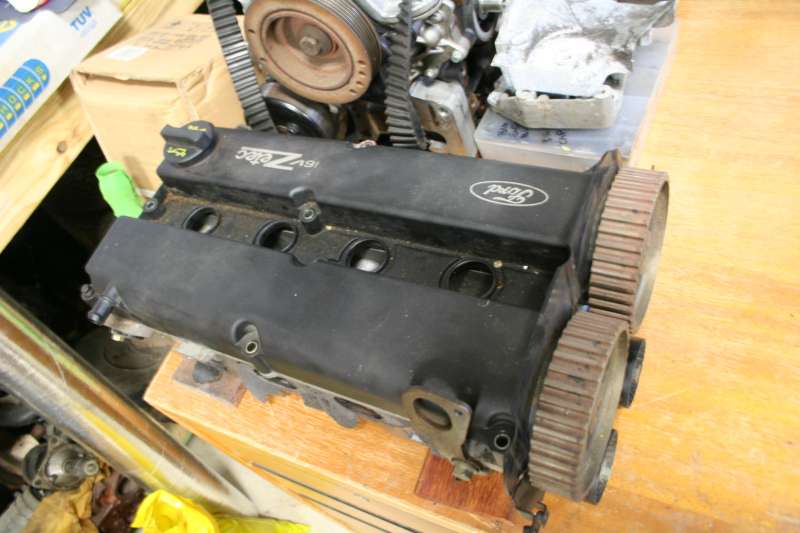
Just to add to the pile of parts in the shed that I may never get around to doing anything with. I thought I needed another engine. A guy in the club was selling an 1800 Zetec for a hundred bucks, and being a sucker for a bargain I just had to grab it. Now I gotta work out which car to stick it in. Maybe I need another shell :)
 |
 |
 |
21 November 2010
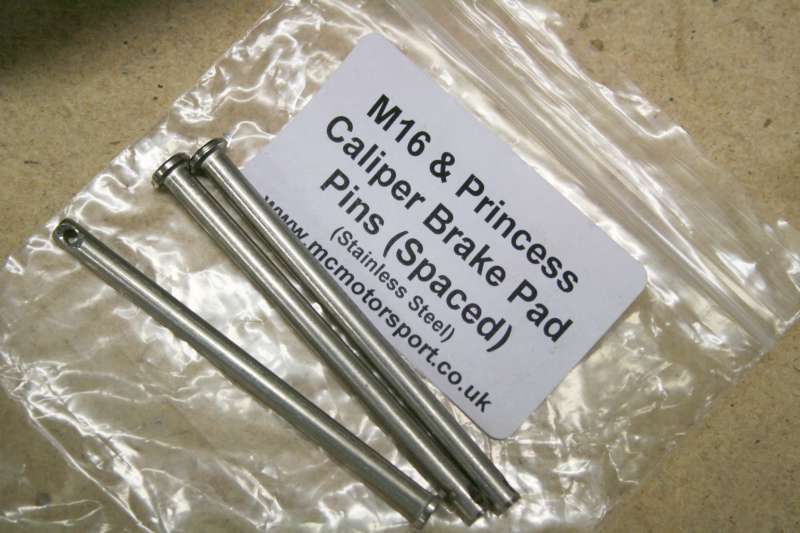
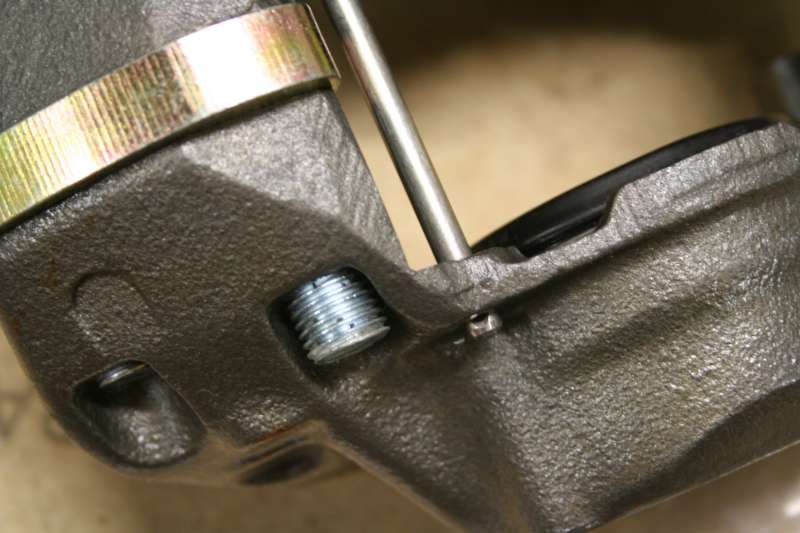
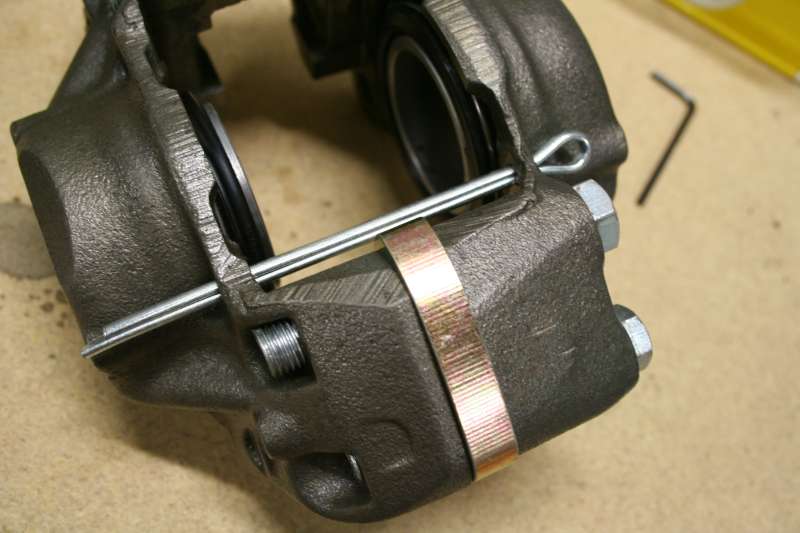
I snuck some spare time in the shed and managed to split the new calipers and put the spacers in. Then I wanted to stick the pads back in, but of course the pins that were meant for a spaced M16 caliper weren't long enough. I wanted to use the pins rather than the dodgy looking split pins, so there might need to be some fiddling done.
 |
 |
 |
 |
3 December 2010
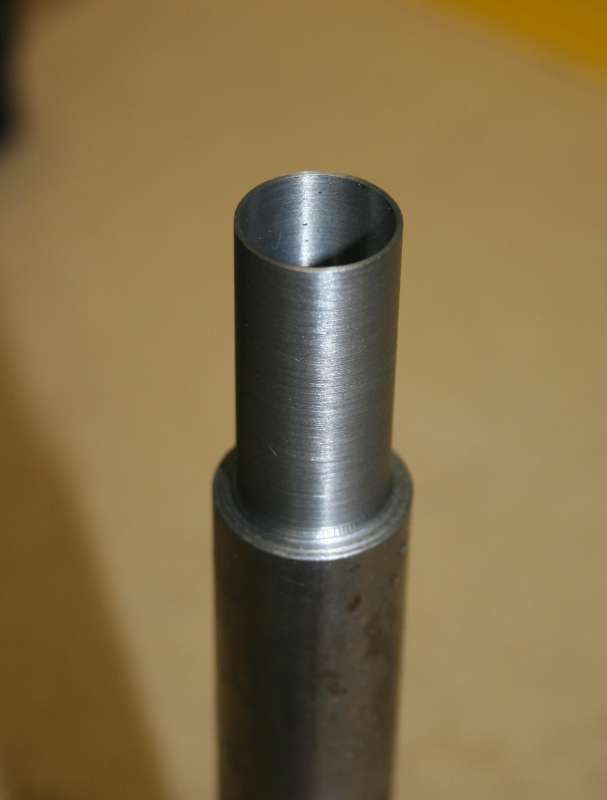
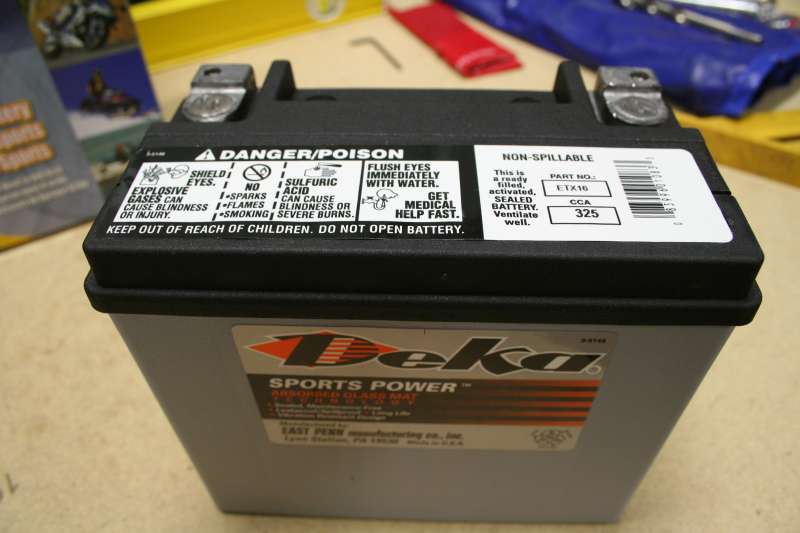
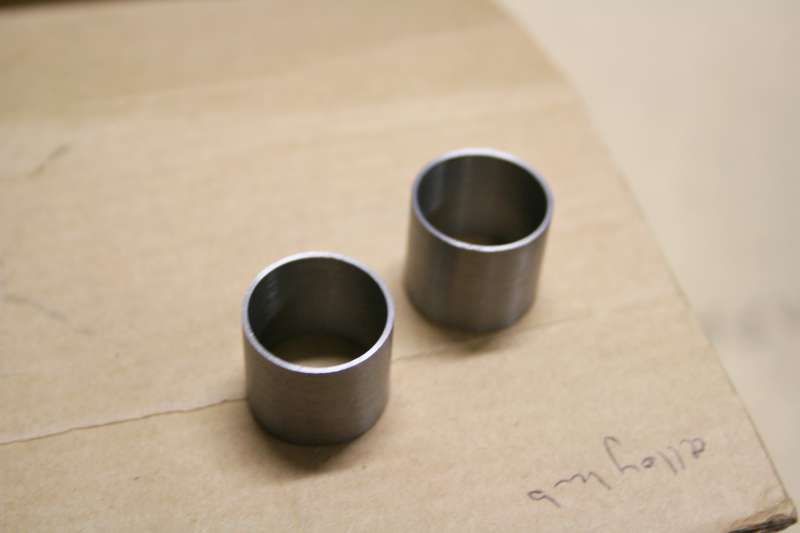
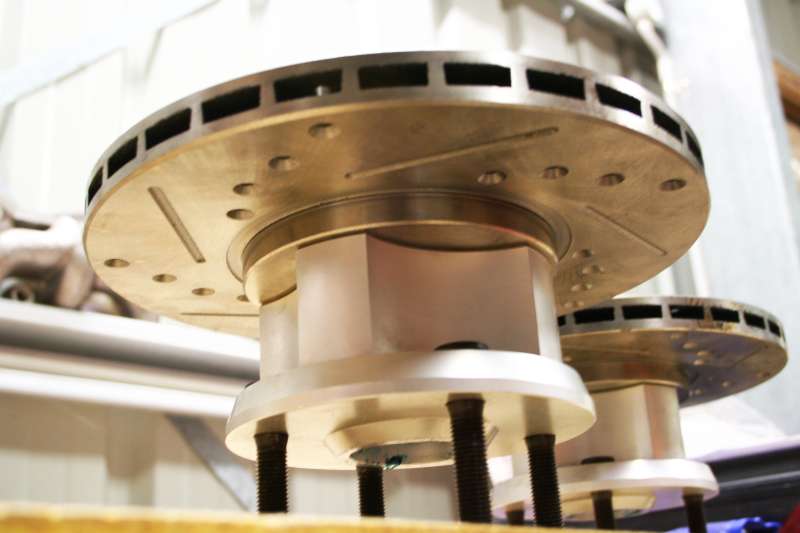
I thought I'd better pull my finger out and get these hubs sorted. So I went up to Trevs to use the lathe to sort out some sleeves for the slightly too big for the stub axle outer bearings. We got the sizes right according to our measurements, and before we cut it up we figured it'd be sensible to see if it fitted the stub. Spot on. So now we can cut 2 14mm wide sleeves from it. And I think now I've got everything I need to put it all together. I think/hope. Also, santa came a bit early for me and dropped me off a battery for Christmas. I want to mount it in the car or the boot to get it out of the way, so I'll have to do some measuring to see where it'll go best.
 |
 |
 |
 |
14 December 2010
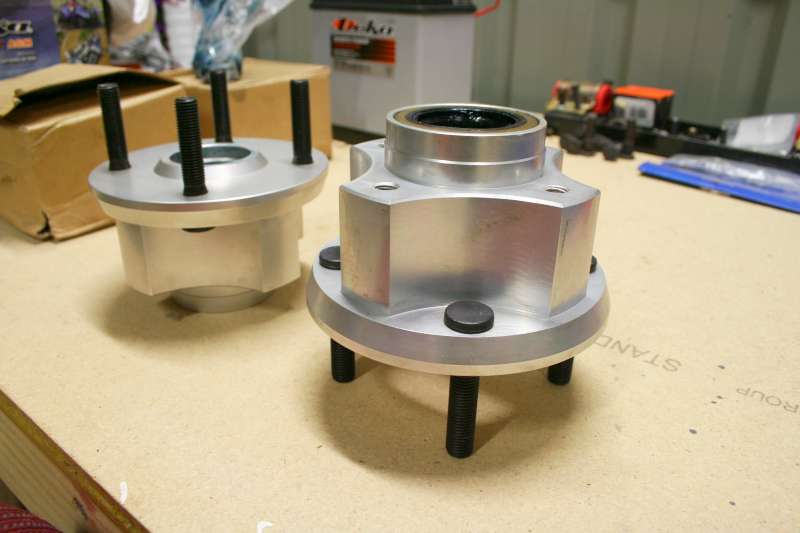
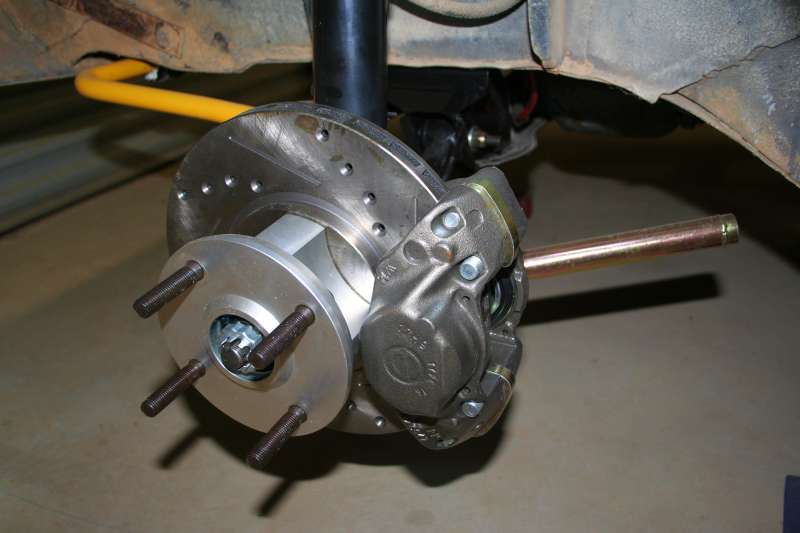
Dropped the hubs and all the gear down to Selby's and they pressed everything in for me. He greased them up and all too which was handy. I put the discs back on and now I just need to torque up the bolts, flip the tabs and then see if the buggers go on the sub axle all nice and easy. I sure hope they do, they've been nothing but trouble so far, so I'm expecting more hurdles.
 |
 |
 |
 |
 |
16 December 2010
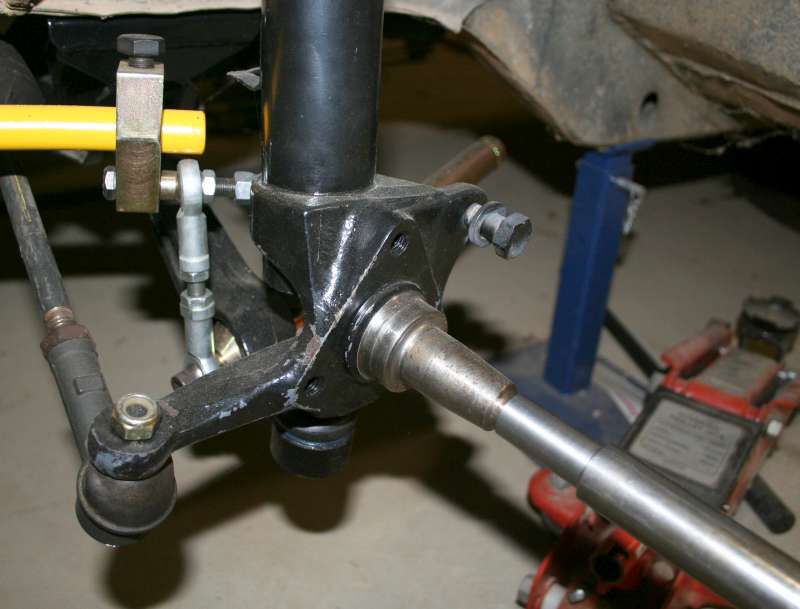
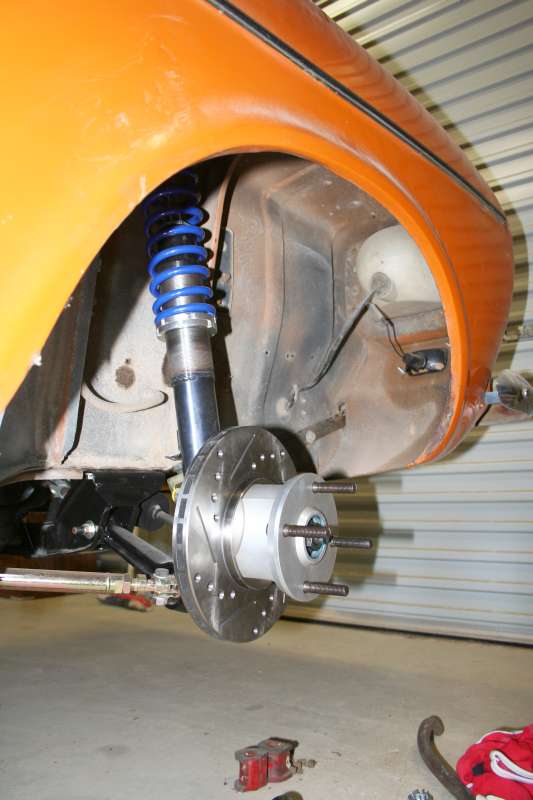
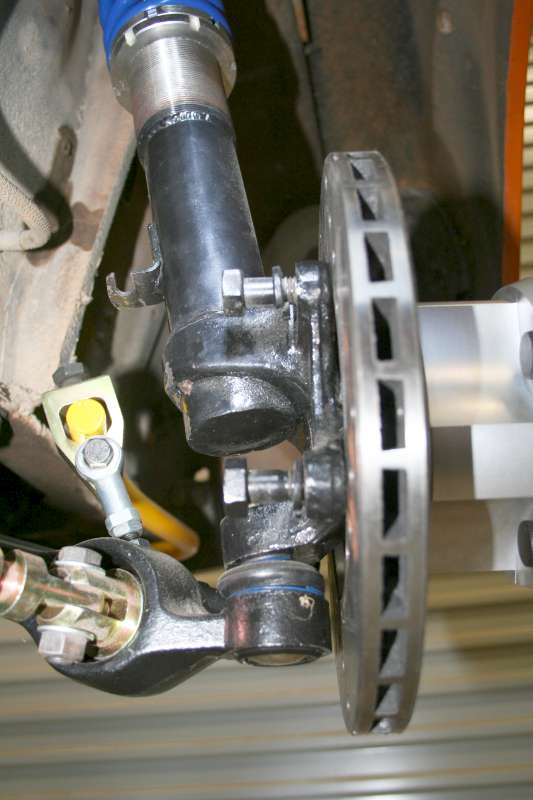
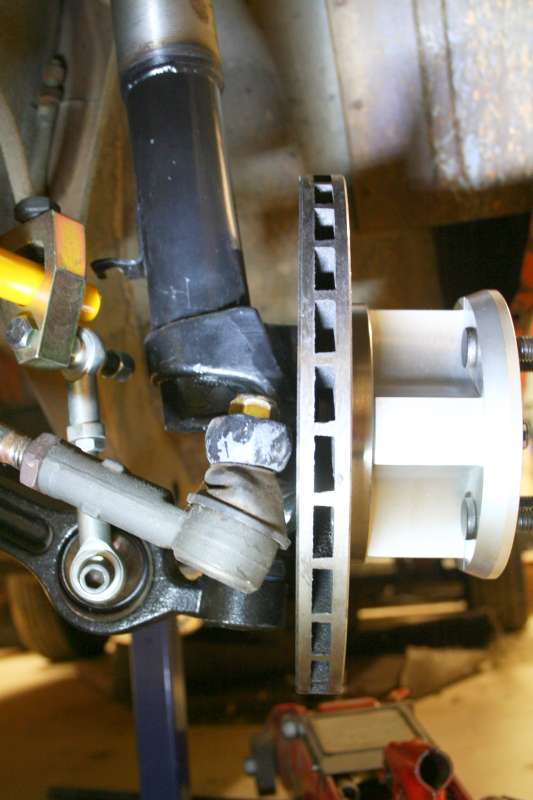
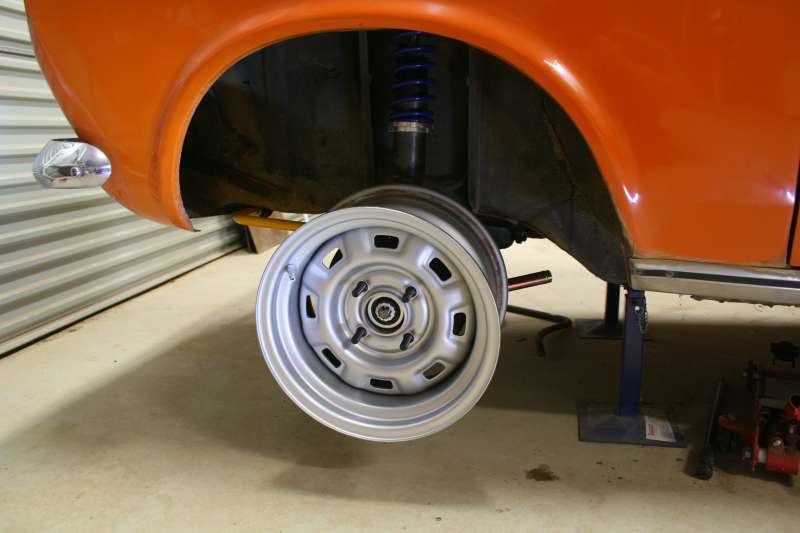
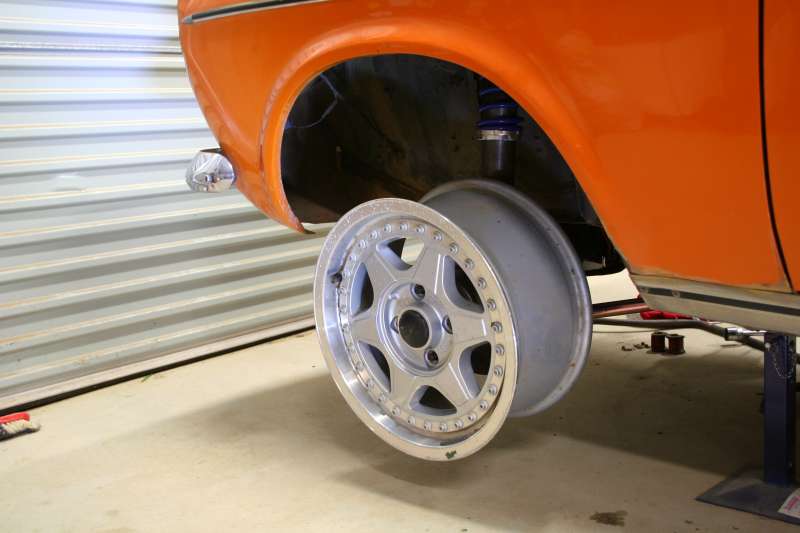
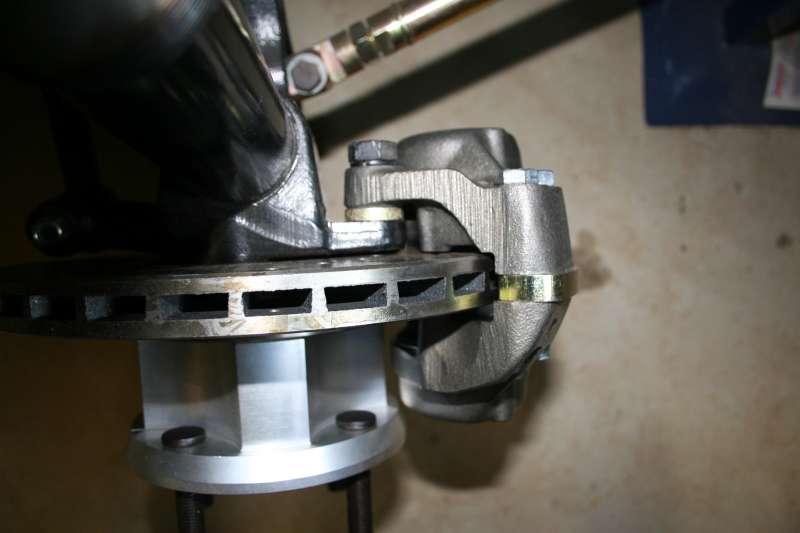
Success!! Of sorts. The hubs and rotors slid on beautifully. The sleeves we made were perfect. All was looking grand. The new hub nuts and washer I'd bought didn't want to fit, so I just used the old ones. And I forgot to get some split pins, so putting the alloy caps on will have to wait a bit. But a new problem has cropped up. Seems there is very little clearance between the rotor and the caliper mounting lugs on the strut. And on the drivers side there is so little clearance that the hub won't turn. A bit of a problem that. I can take to the lugs with the angle grinder, but the more worrying bit is the clearance to the steering track rod end. I don't want that rubbing. But to lift the motivation again I had to try some wheels on. First the 13x7" steel. Nice. Then the 15x7 Audi alloy with the spacer. Even nicer!
 |
 |
 |
 |
 |
 |
 |
 |
20 December 2010
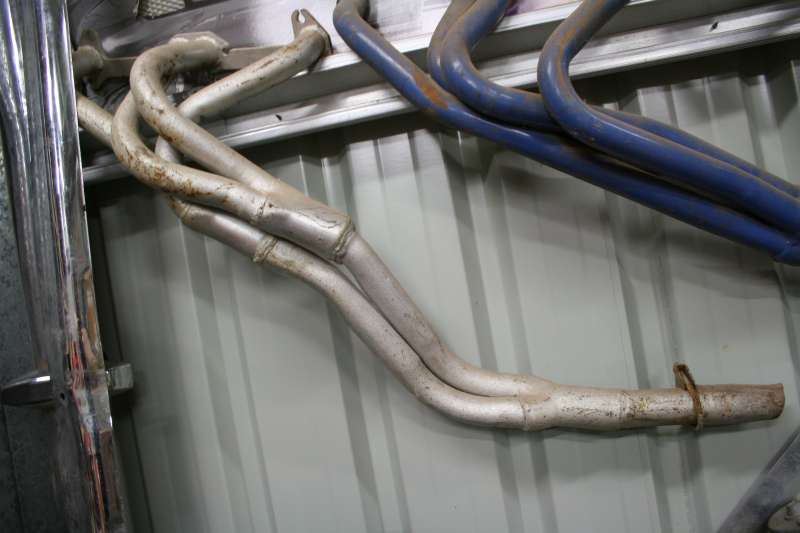
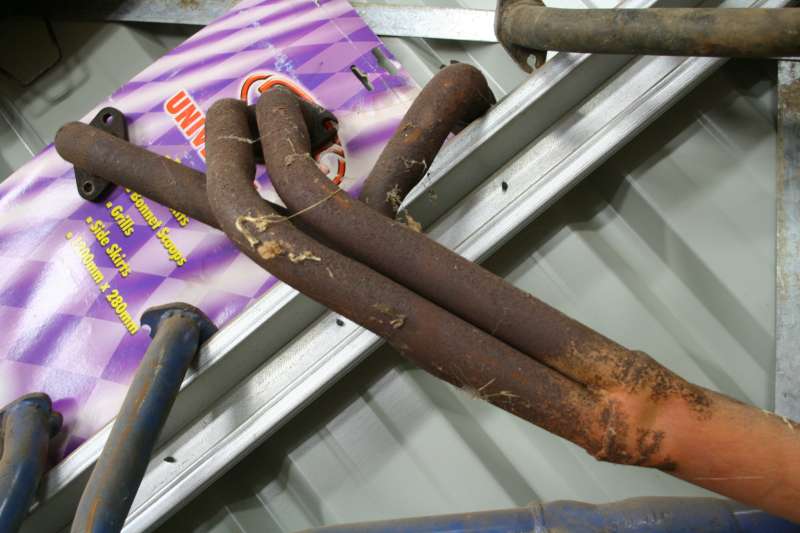
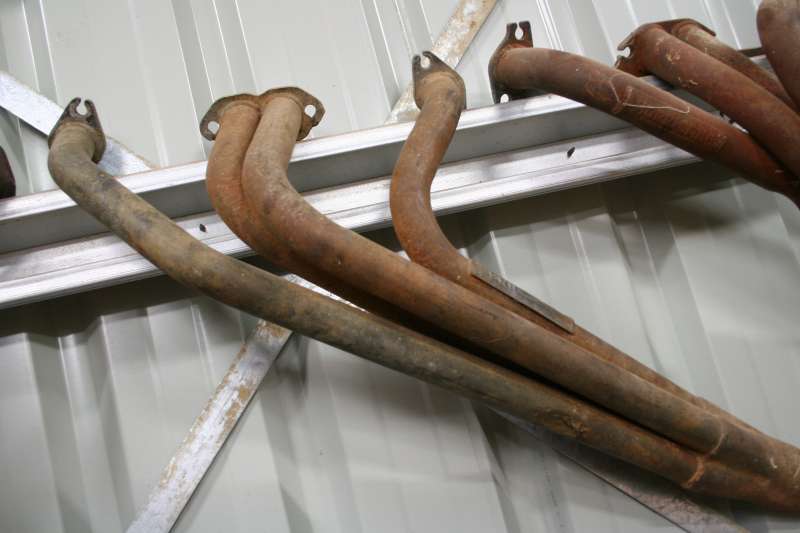
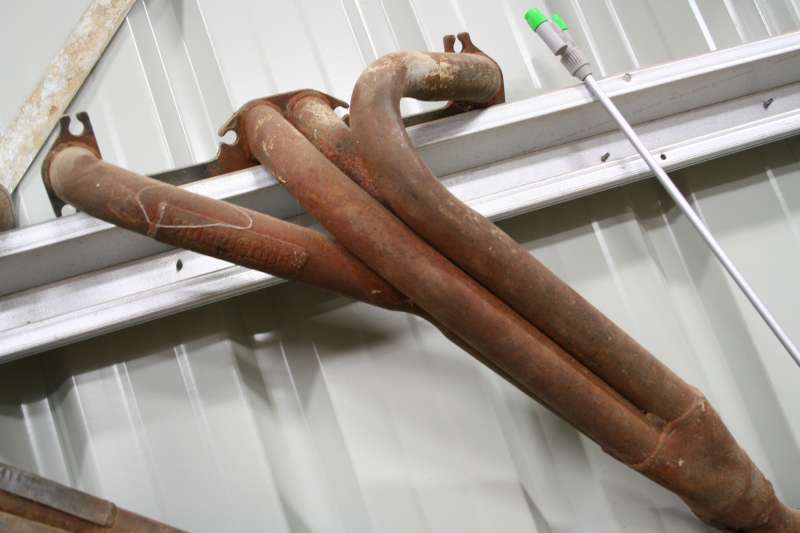
Thinking about getting the thing started up has led me to looking at the sets of extractors I've got. I'll need some on before firing the old bus up. Not sure which ones to use though. Off to the www for opinions.
And with the rotor clearance issues above, it looks like I'm going to have to get about 4mm machined off the hub where the rotor bolts on. This will give enough clearance and should line the rotor up in the middle of the caliper. I need to offer up the calipers and do some measuring.
 |
 |
 |
 |
5 January 2011
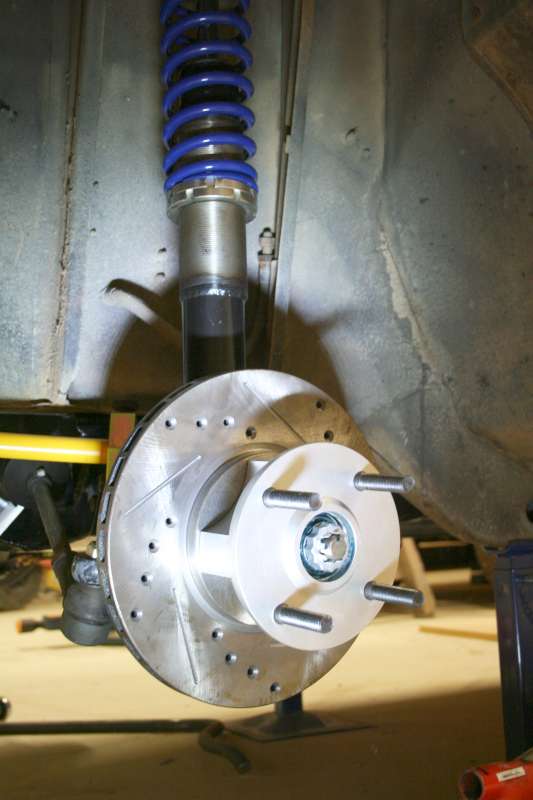
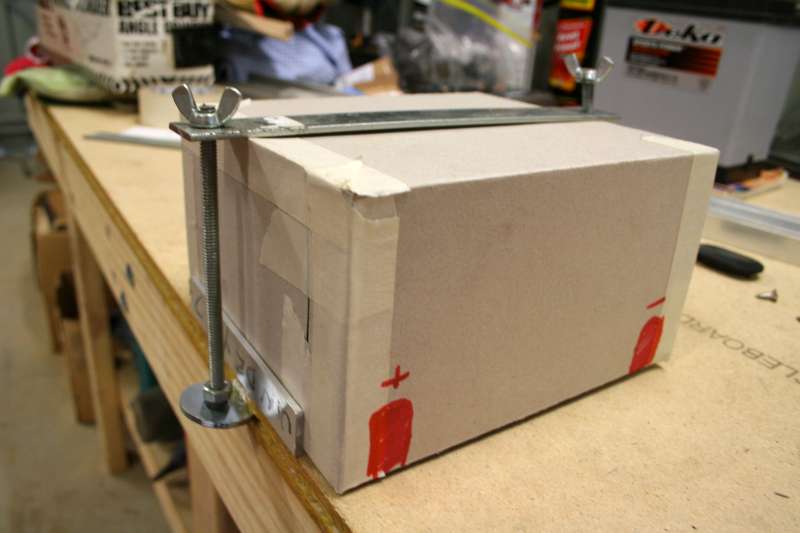
I'm fiddling around trying to work out where to mount the battery, and how to do it. I was thinking of under the passenger seat, but then this setup may end up being too tall. I also found a couple of spare minutes over Christmas to drill out the caliper mount spacers so the bolts fitted, and then mounted the calipers. I just need to do some measuring now to see how much I need to take off the hubs.
 |
 |
 |
 |
 |
5 January 2011
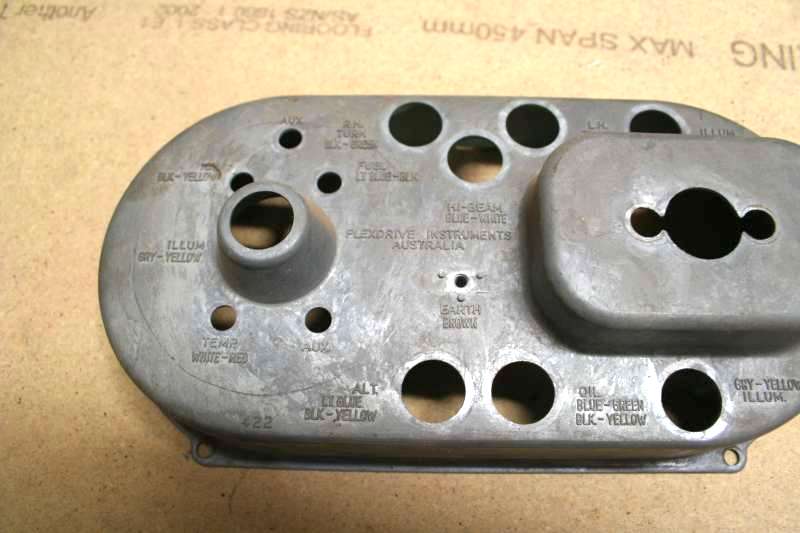
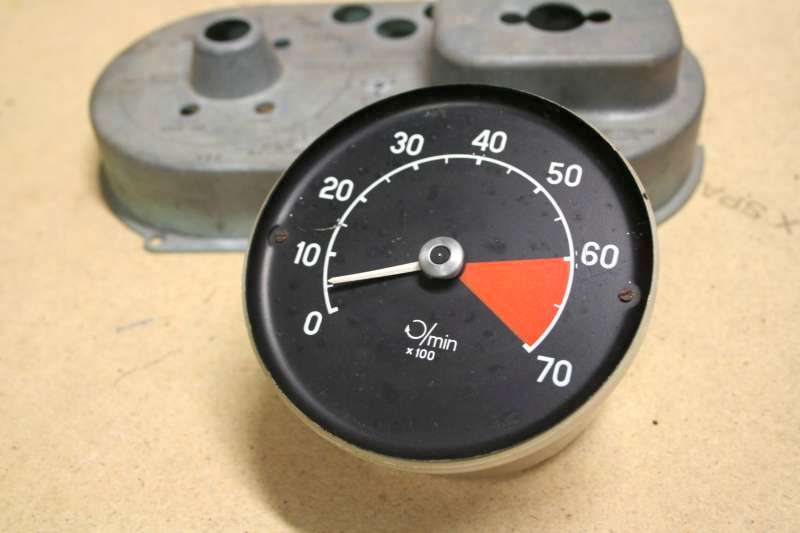
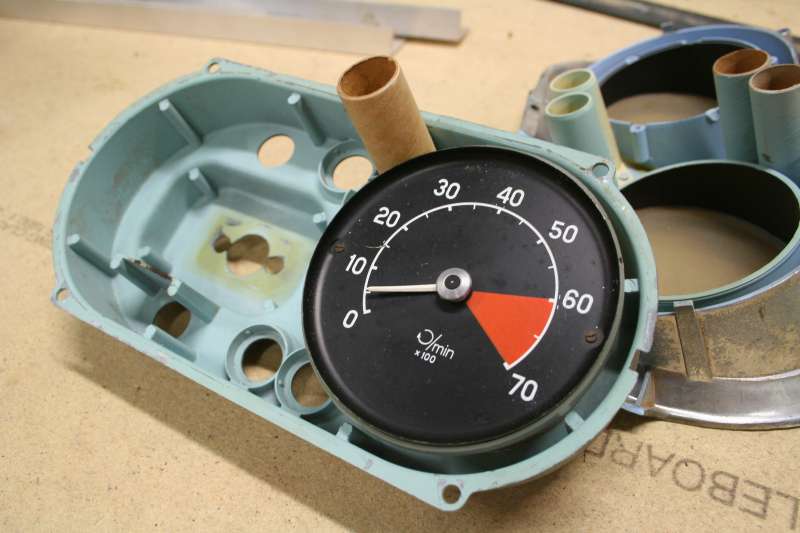
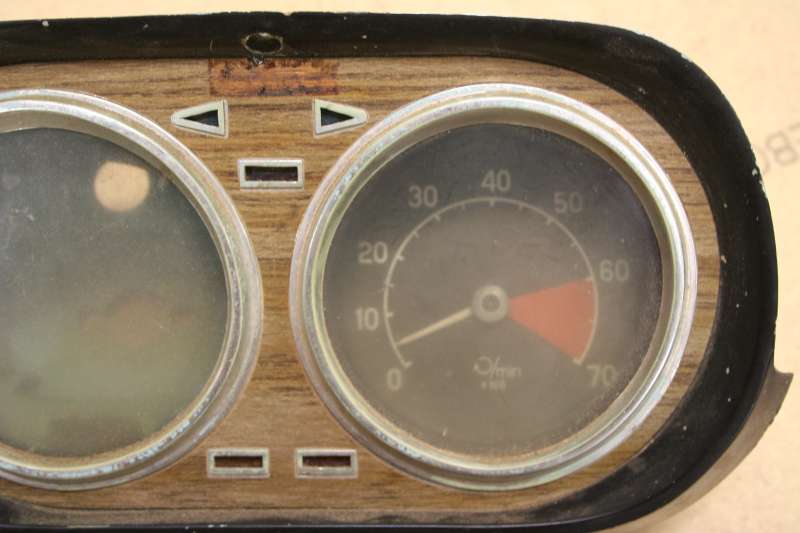
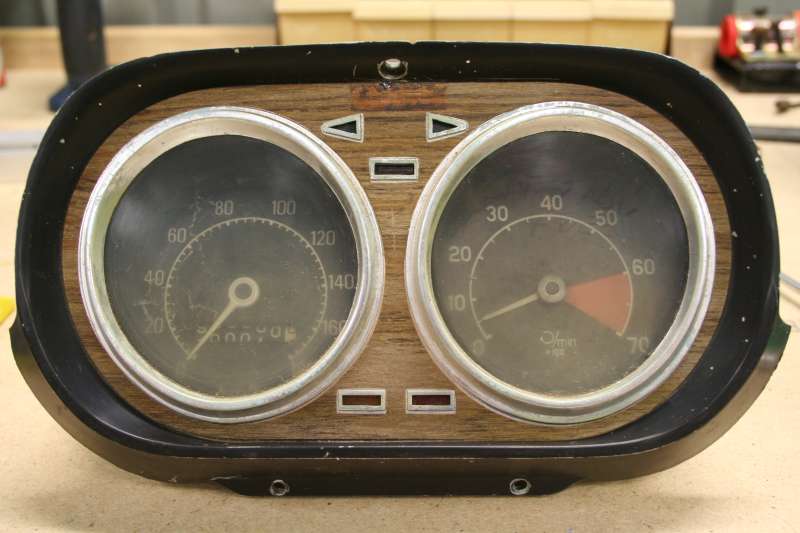
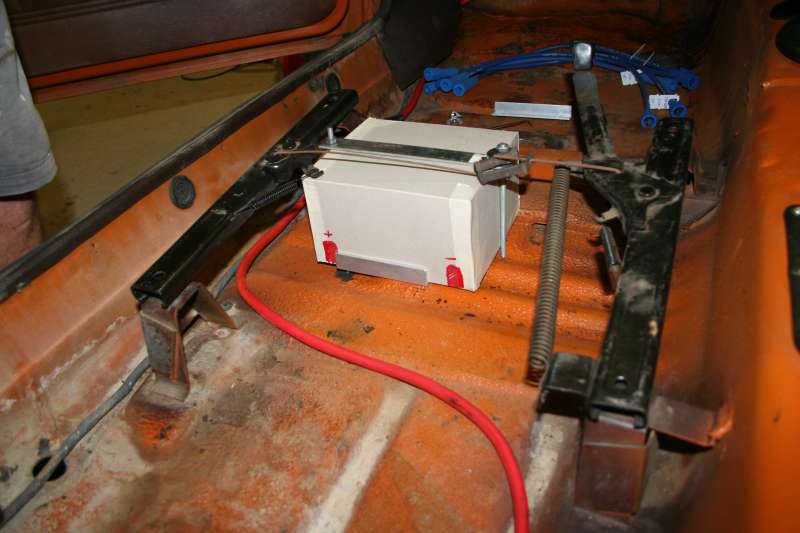
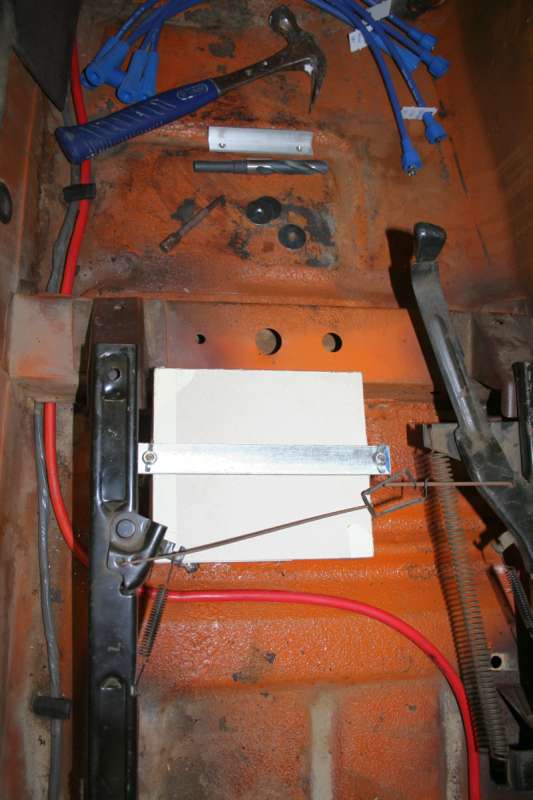
I've been fiddling with my battery mount and trying to work out the best way to mount it solidly. I'm going to jam it up against the seat rail, and have an aluminium bracket at the other end, and then the 2 tie-down rods either side of it. I'll have to push it as far as I can over to the door so my rod and nut clears the chassis rail under the floor, but it looks like it'll fit fine under the seat and seat frame. I also has anotehr look at the tacho and dash. I might cut a hole in it to see how it all might fit together. Theo from the SFCC has just done something very similar so its got me all excited now.
 |
 |
 |
14 January 2011
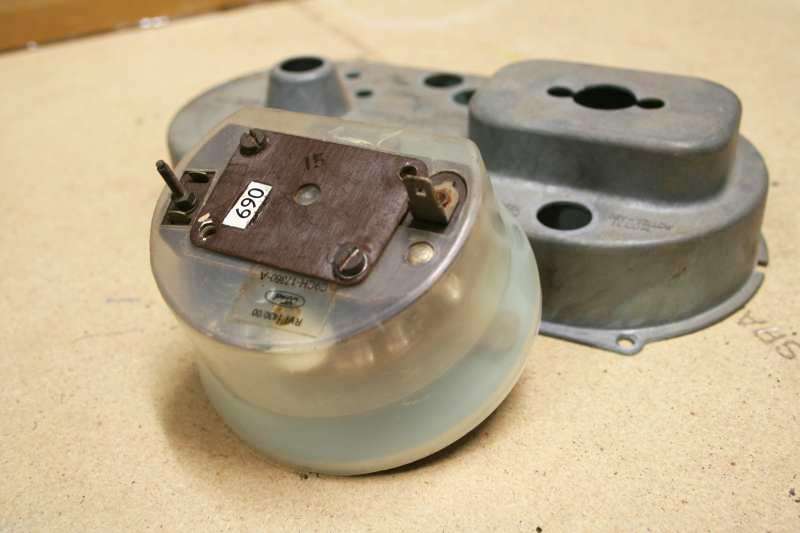
Got a bit more time down in the shed. Was nice working in the afternoon with both doors open and the cool fresh air coming in. Then as it got dark too many bugs came so I had to shut them again. I cut the battery tray out a while back, and i cleaned it up a bit today. I think I still need to get rid of the vertical support. Needs some paint on it now to stop the rust coming back. Then I got the grinder out again and cut a hole in one of my spare dashboards so I could test fit the tacho. A bit of a fiddle with a file and it sits in there really nice. Once I'd fiddled with the odometer for ages trying to get it back to zero (which I didn't manage), I got on with attaching the battery mount to the floor. Somehow I managed to get my aluminium braket in the wrong spot, so that'll need moving. Now I just need to fit it with the battery and then clean up the brackets a little. It looks like it'll work a treat though.
 |
 |
 |
 |
 |
 |
 |
 |
 |
| < | 1 | 2 | 3 | 4 | 5 | 6 | 7 | 8 | 9 | 10 | 11 | 12 | 13 | 14 | 15 | 16 | 17 | 18 | > |