
Towrota by Drew | page 5 |
| < | 1 | 2 | 3 | 4 | 5 | 6 | 7 | 8 | 9 | > |
24 May 2008
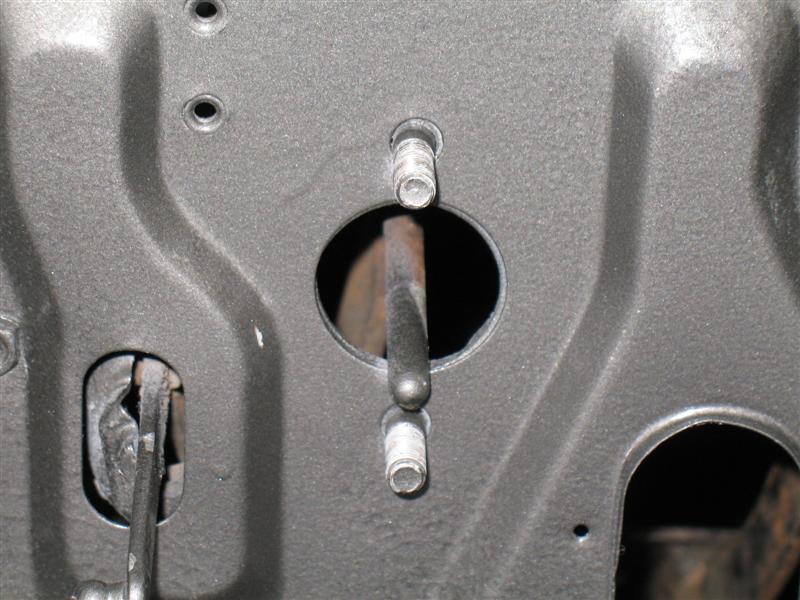
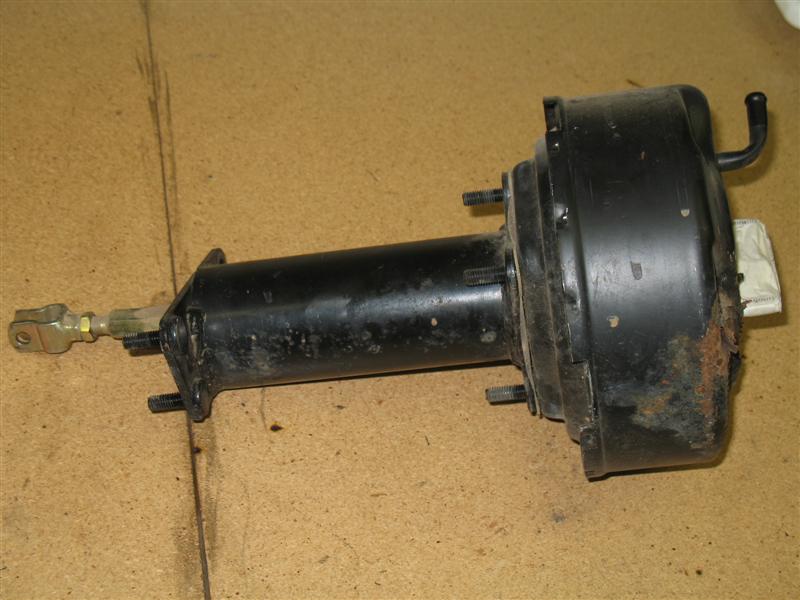
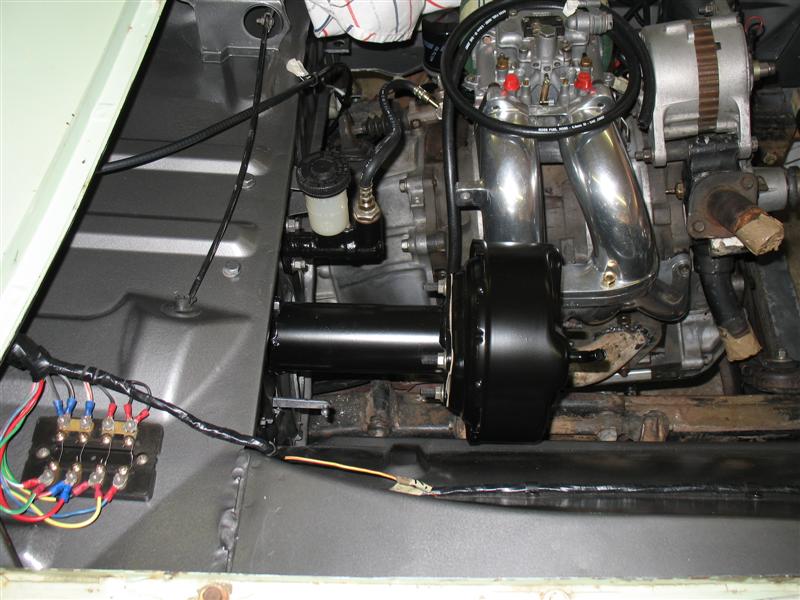
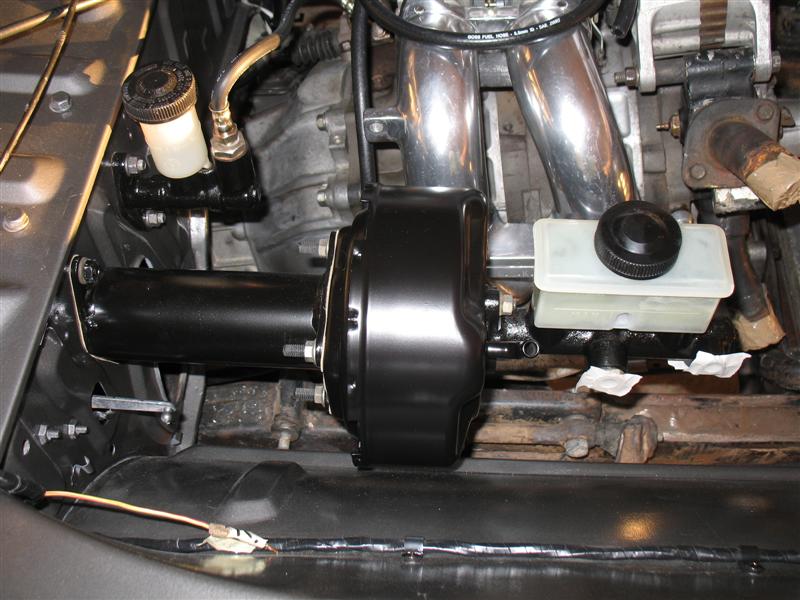
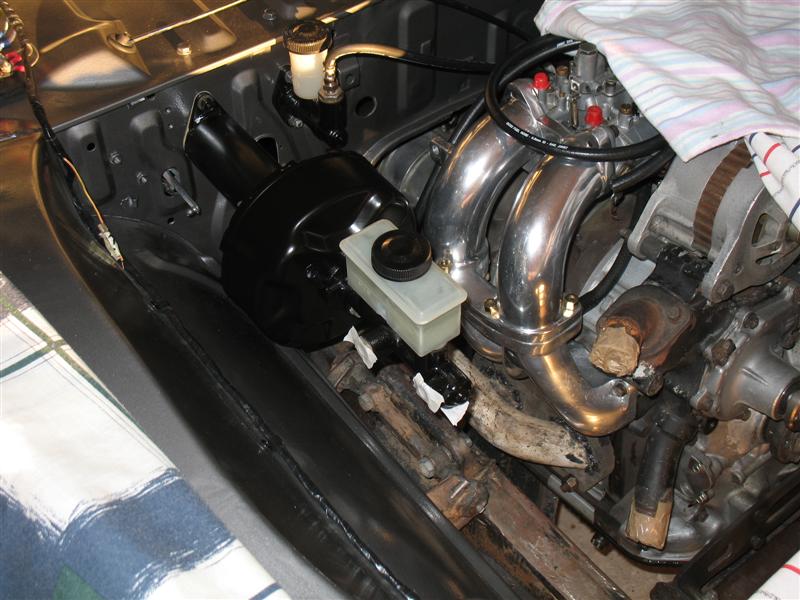
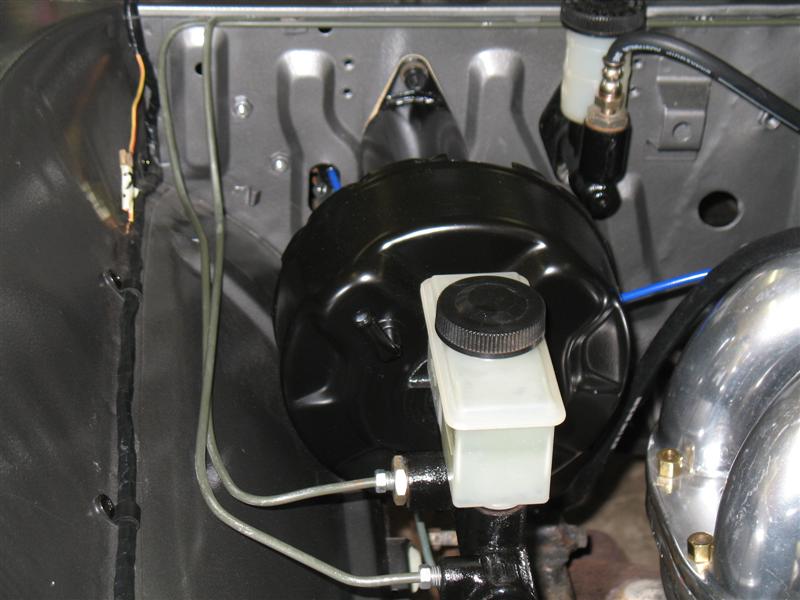
I've been giving the brake situation some serious thought for a while now. I knew I was using the disc brake front end, but I wasn't sure what to do about the booster. The B1500 never came with a booster from factory, so I had to sort something else out. I contemplated lots of different ideas, including a remote booster, but to be honest, my budget doesn't extend that far at the moment. I had been given a B2000 booster off a ute that was going to the crusher, so I modified the mounting bracket to the firewall, drilled new holes in the firewall and bolted it up. It all seems to be fine so far. Clearance all round the unit is fine, the new bolt holes seem to be very solid in holding it up and when I checked the rod for length when the booster was flush to the firewall, the rod sits in exactly the same place as the original B1500 rod. I guess time will tell when I test the brakes for the first time, but so far so good...
Next step? Plumb fuel lines up and make a linkage for the throttle to carby. Thinking caps on for this one!
 |
 |
 |
 |
 |
 |
4 June 2008
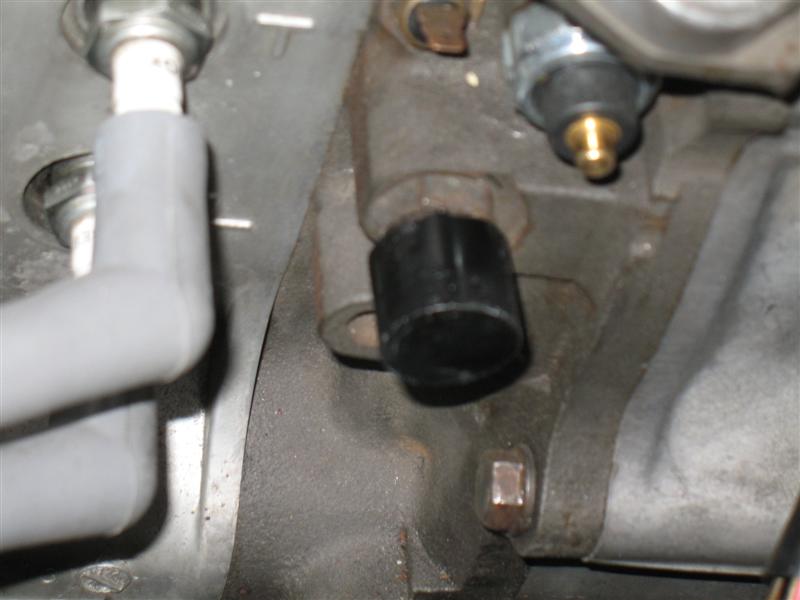
Couple of small things today. Made a plug to block off the heater outlet from the block. I won't be running a heater in the ute (demister only), so don't need the outlet. Also connected up the brake lines and repositioned the oil catch can as the brake lines were in the way.
 |
 |
 |
7 June 2008
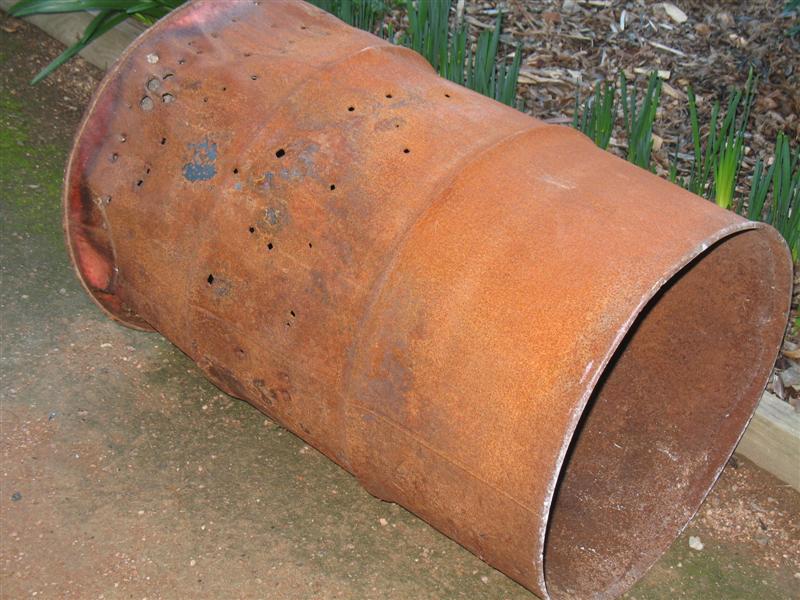
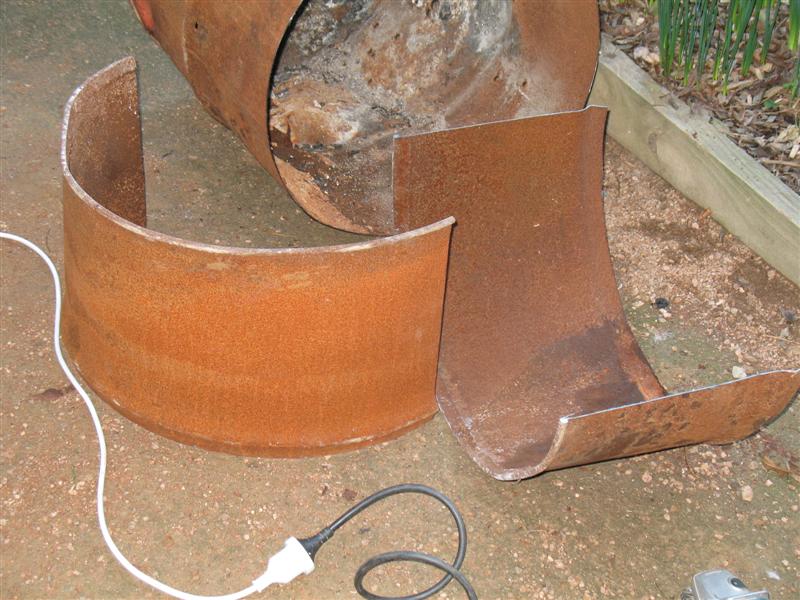
I know it's not the engine bay, so technically I'm cheating by jumping ahead, but I found this rusted out 44 gallon drum at the local rubbish yard and came up with the perfect idea for it. Mudguards! I was originally going to try and find some off a box trailer, but they would be angular and I don't think that would suit the look I'm going for. So I hit on the idea of using a rusted out 44 for mudguards, and I reckon they look a treat. They are a bit wide yet, but I will cut them down later on. All I need to do is weld up a frame for each side out of 10mm rod or something similar, mount it to the backing plate so it moves with the axle and then attach the drum 'skin' to the top. The edge of the 44 has a nice big thick bead around it for strength, so that should help keep some rigidity in the mudguard. Back to the engine bay for now, but can't wait to make some frames and mount these up! Perfect!
 |
 |
 |
.jpg) |
 |
13 June 2008
I know I said I was going to get back to the engine bay, but I need a break. I've been in and around that engine bay area for the last 9 months and I'm about sick to death of it. So I've decided to take a few weeks off it, do something interesting and then go back to it.
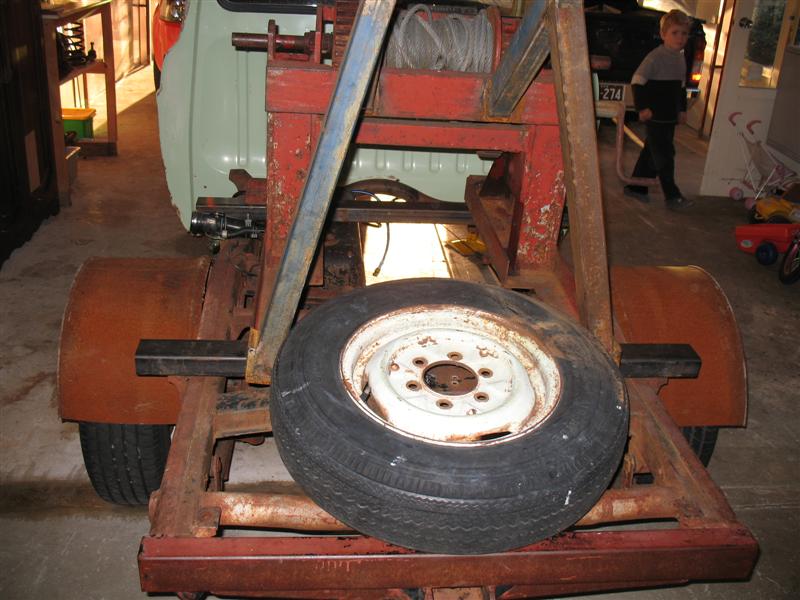
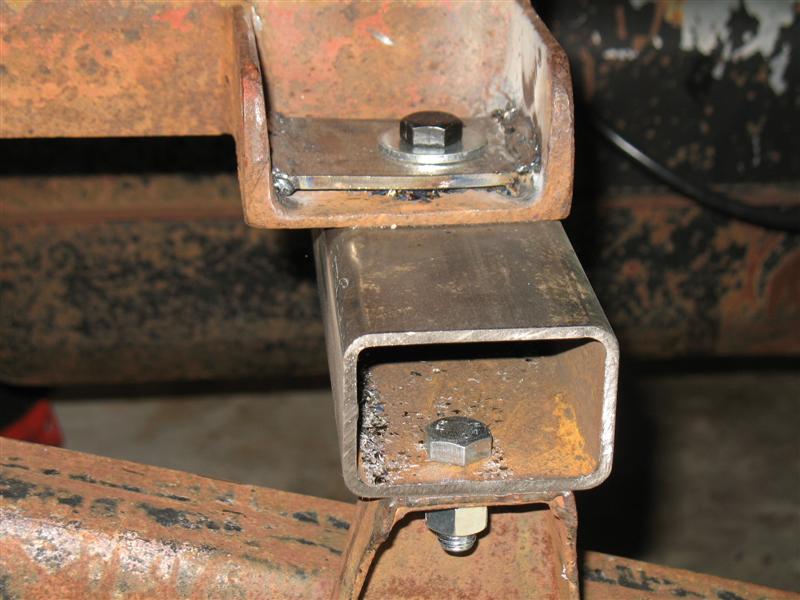
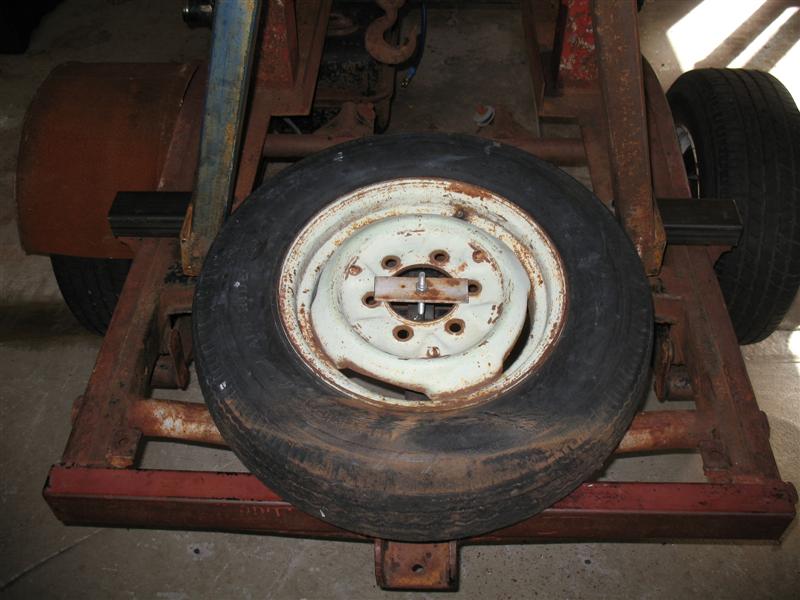
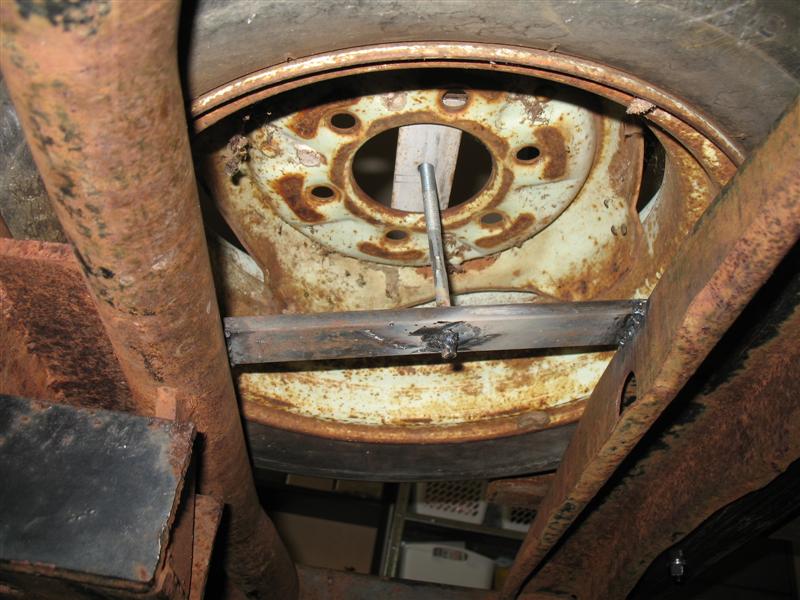
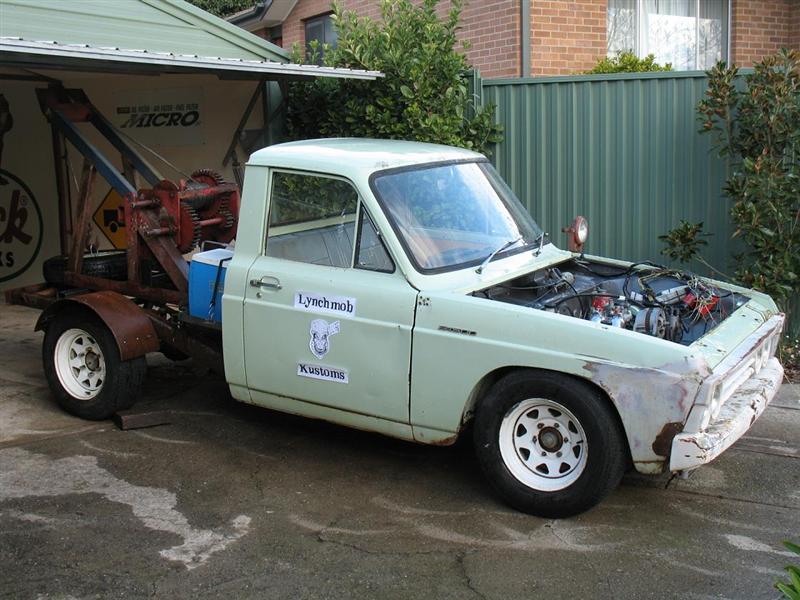
So in the last few days, I've been concentrating on getting the tow unit secured. I cut the main 'bearer's' to length, drilled and bolted them down using the existing tray mounting points on the chassis. Then I drilled new holes in the tow unit and bolted it to the bearers. I had to cut a small plate for the front ones, as there were old holes and it wouldn't have had enough meat to hold it strongly. So I just cut a plate for each side, welded them off and then drilled new holes. Tightened it all up using high-tensile bolts and it's very strong and rigid. Then to fill in the bare area at the rear of the tow unit, I welded in a small piece of flat bar, welded in a threaded rod and then mounted one of the original front wheels from the ute on there. It's really for only for decoration and to fill in a bare spot, as there's no way I'd use that old tyre as a spare. But I think it looks good and adds a bit of character as well.
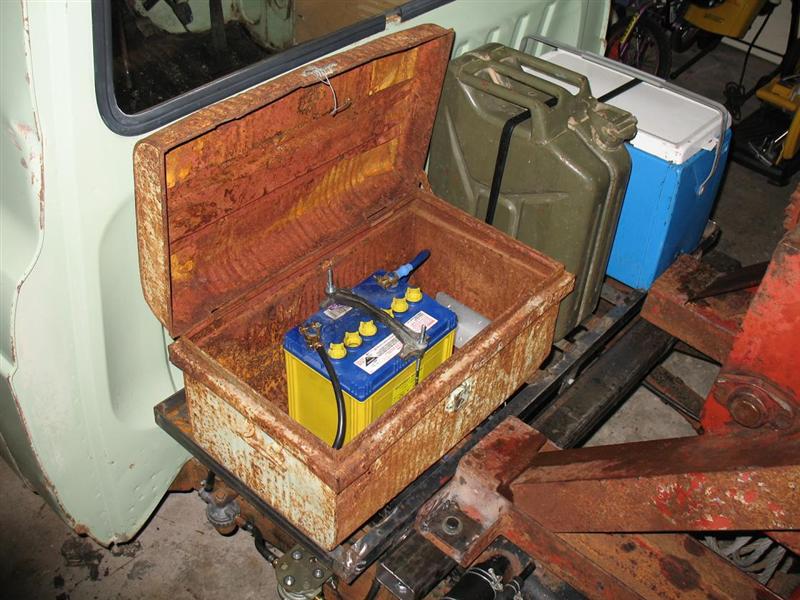
Next step? Onto making a frame to hold the battery box (rusted old chest - you'll see in time), my old metal esky and a rusted jerry can. Sounds dodgy, but it'll look great when it's done.
 |
.jpg) |
 |
 |
 |
20 June 2008
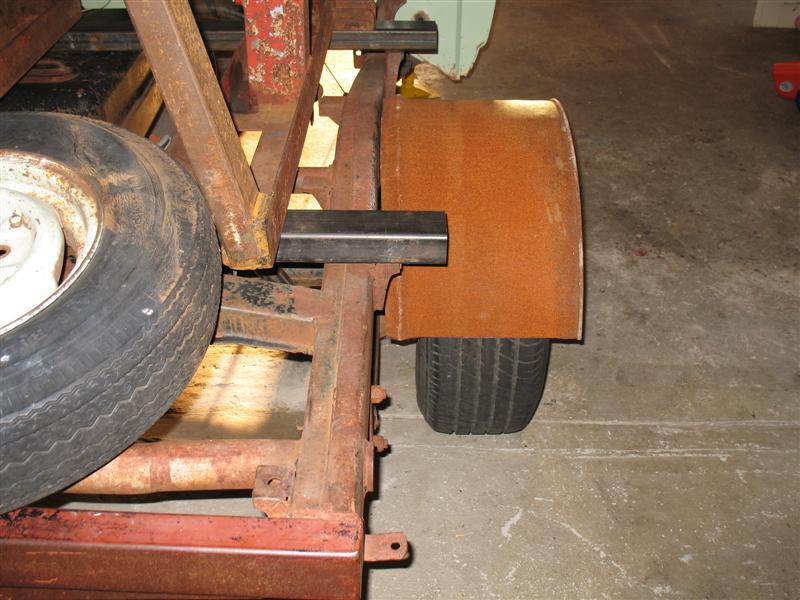
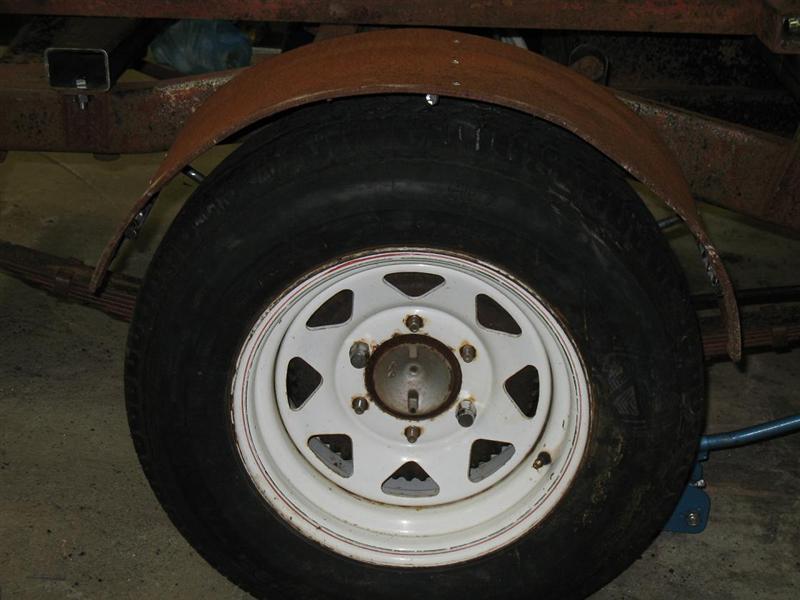
Finished making the drivers side mudguard today. It took a bit of thought as to how to mount the mudguards as I wanted them to move with the wheel, not with the chassis. I ended up using a 75mm saddle around the axle and then bolted a flat bar to the bottom. Then I used 12mm rod and made up three 'posts' in a fan fashion. Welded them off, and then put two pieces between for bracing. I then welded a small piece of flat bar to each post. I cut the mudguard itself to the required width and riveted it to the flat bar underneath. I must admit, it would be very difficult to have zero movement in the mudguard, and to that effect, I do have a tiny little bit of movement, but I'm still extremely happy with how it turned out.
 |
.jpg) |
.jpg) |
.jpg) |
.jpg) |
.jpg) |
.jpg) |
I've had an idea in my head for pretty much the life of the project so far. I wanted something to fill in the dead look between the tow unit and the ute cab. So I came up with the idea to put a frame in between and mount my battery there. I found an old rusted (and as luck would have it, light green) chest at the local recycling place and from this I made a rectangular frame out of 40mm angle. Then I mounted the old chest on one end, braced the bottom and secured the battery. I then run my new battery leads from the chassis etc up into the box and used small rubber grommets to prevent the leads from being rubbed through and shorting out. I also made a base up for my old metal esky and a jerry can and welded half chain links at the base to hook occy straps onto. The battery box is tight as a nut, the esky has a tiny little bit of movement (which will be easily fixed with a couple of rubbers between the esky and metal frame) and the jerry can has a little too much movement. I will need to think of something to take the sway in the head of it out. Overall though, I am rapt. I've achieved my goal of losing the bare look between the cab and the tow unit, and it looks authentic with the old esky and chest.
 |
.jpg) |
.jpg) |
.jpg) |
.jpg) |
.jpg) |
Now I've got to move on and build the passenger's side rear guard and then start 'unseizing' the tow unit. After so long being exposed to the elements, I think that will take some doing...
6 July 2008
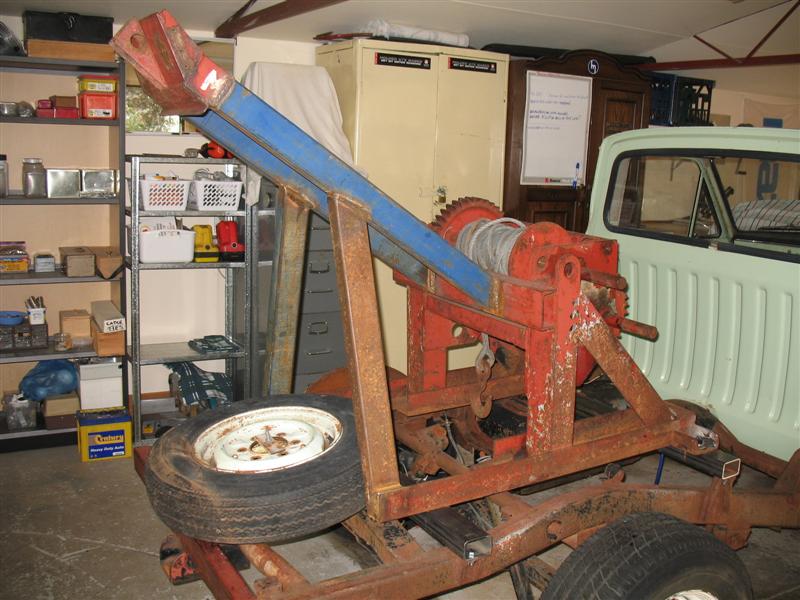
I put in some serious hours over the weekend and got a massive amount done. After finishing the passenger side rear mudguard, I then continued to try and 'unstick' the seized tow unit. After about 4 hours in total, I had the external rollers moving again and the internal bearings freed. Went through almost a full can of RP7 and about the same amount of the thinnest engine oil I could find in the shed. But it was well worth it. After more than 30 years, the tow unit now actually works and works well. It has a home-made handle and it turns beautifully. Very, very pleased with myself to have overcome that hurdle and have such a substantial piece of work completed.
So all the construction on the rear of the ute is now finished. That's the frame behind the cab, two mudguards and the tow unit. Next step is to mount a number plate, put some new tailights on and wire them up and mount two lights at the 'head' of the tow unit and wire them in (they'll be reversing lights and double as viewing lights for night-time club runs!). Putting 'trizzy' things like tailights and reversing lights on will look wierd considering there's been none there for so many years, but I'm looking forward to it!
Here's some photo's I took today after pushing her out of the shed to do a big shed sweep out. Looking better all the time!
 |
.jpg) |
.jpg) |
.jpg) |
.jpg) |
12 August 2008
Work on the ute has been progressing along fairly steadily over the past few weeks. A trip to Qld for two weeks (Hi Lloyd!) slowed things down and my wife has been working me pretty hard in the garden too. But nevertheless, things are still on track. Over the past five weeks I've put new tailights on, new reversing lights (at the head of the tow unit), incorporated a numberplate light into one tailight, wired all that and then run the wires up to include the fuel tank sender unit, the interior light (which for some reason exits the back of the cab and comes in off the rear loom) and the positive wire for the Carter fuel pump.
Put a new gearknob on, put an inline filter in the engine bay, put on the hot rod type side mirrors, repainted the old sign on the tow unit and lots of other little things I can't remember.
Next step is to finish the little bit of rear wiring and then I think I'm going to have to revisit my rear mudguards. The offset on the rims I want to use is not quite right and as a result the mudguards aren't sitting quite right. I'm getting an old 205/70/14 put on one of the rims I want to use and then I can mount it and see how it looks.