
Towrota by Drew | page 6 |
| < | 1 | 2 | 3 | 4 | 5 | 6 | 7 | 8 | 9 | > |
6 September 2008
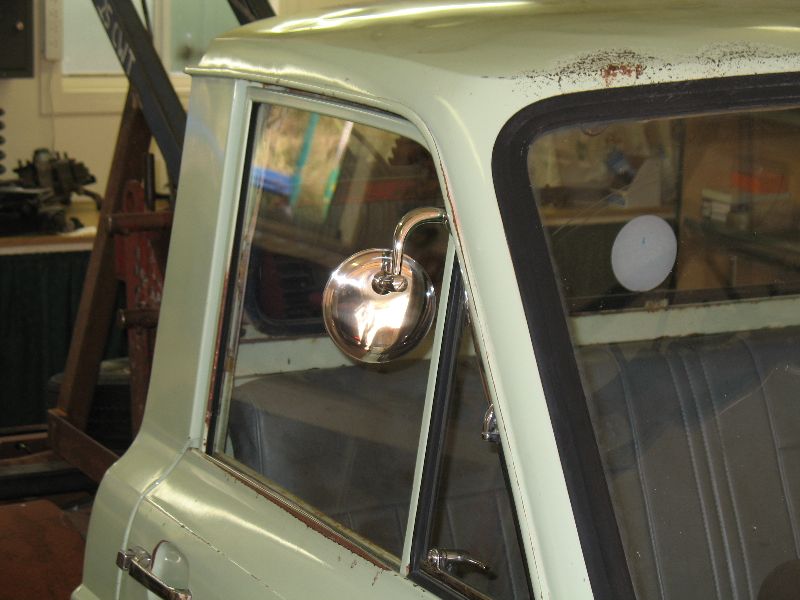
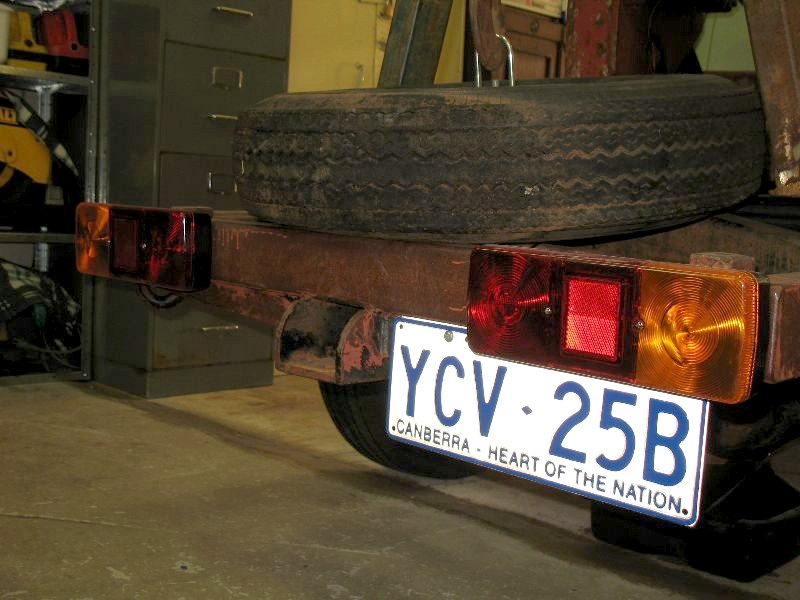
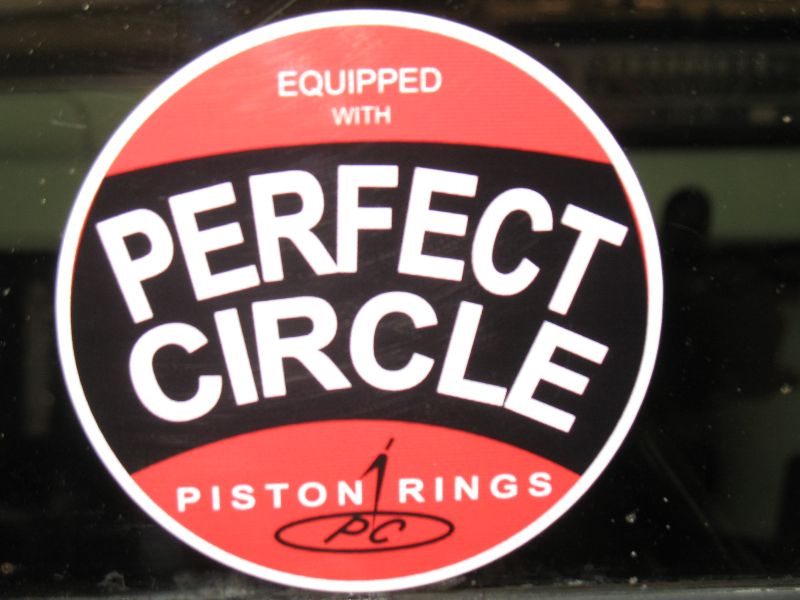
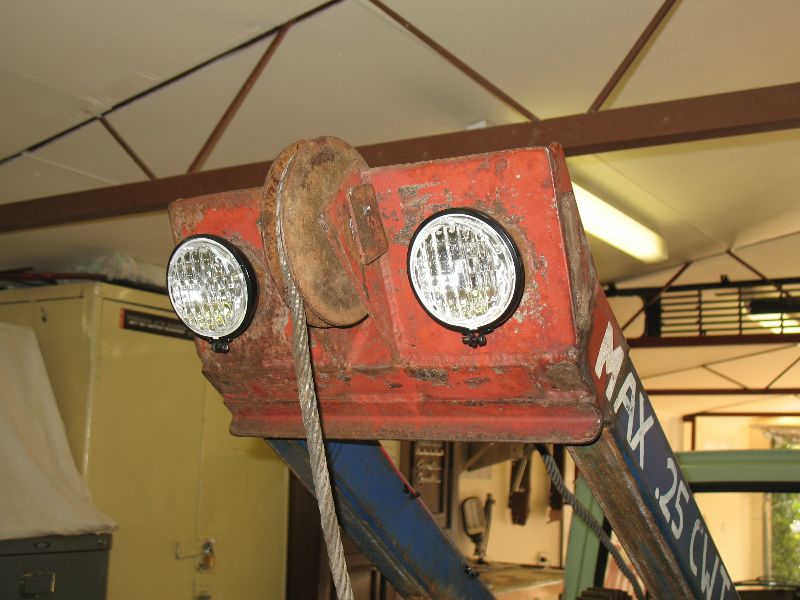
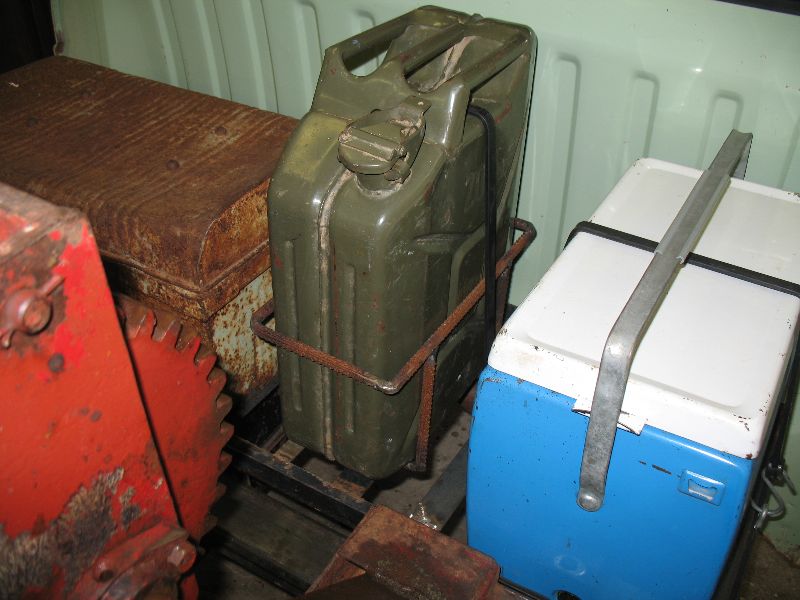
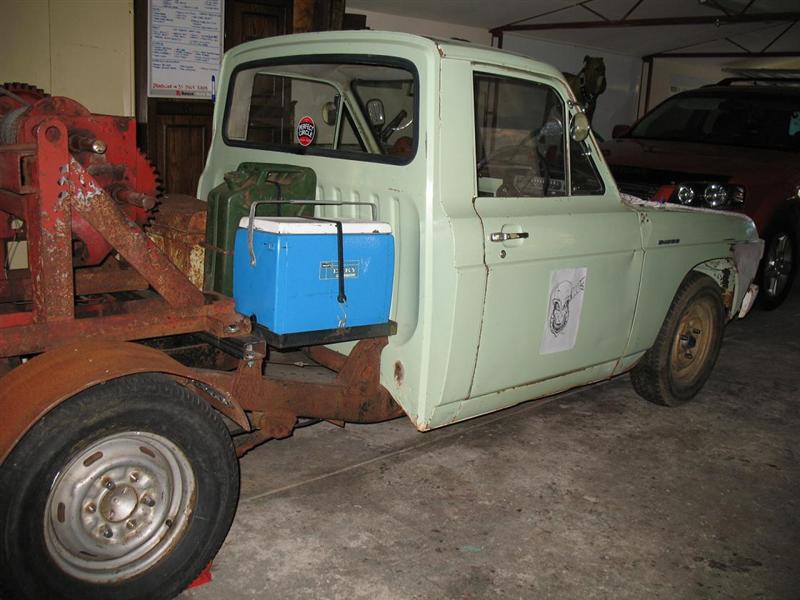
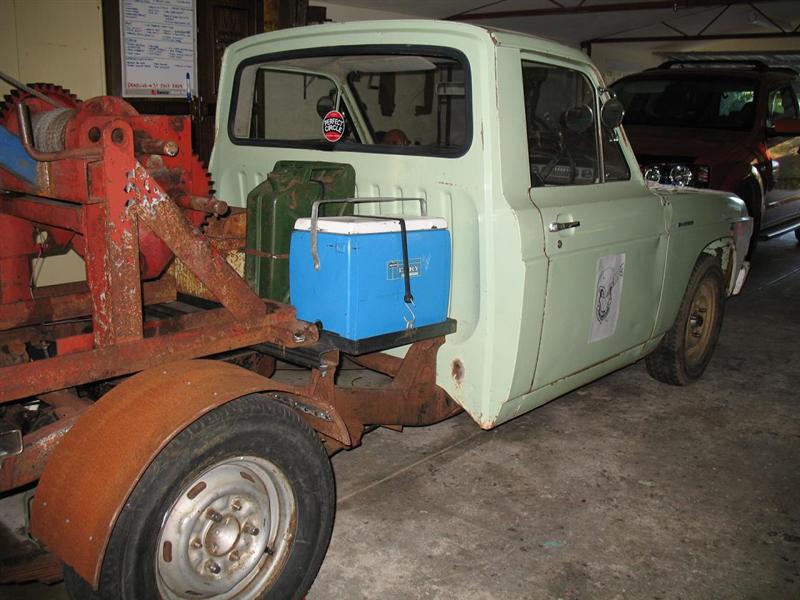
My last update was a little underdone, so here's a proper one! The below photo's show the most recent work done as explained in the previous post. The hot rod type mirrors, new rear tailights, Perfect Circle piston rings sticker (huge modification that one!), reversing lights at the head of the tow unit and a 'cage' for the jerry can as it had too much movement. After also walking around the farm at home and finding a gearbox 'splitter' on an old truck gearbox, I thought that might be something a little fun to put on. I think it looks great (and is sure to keep people guessing!).
 |
 |
 |
 |
 |
 |
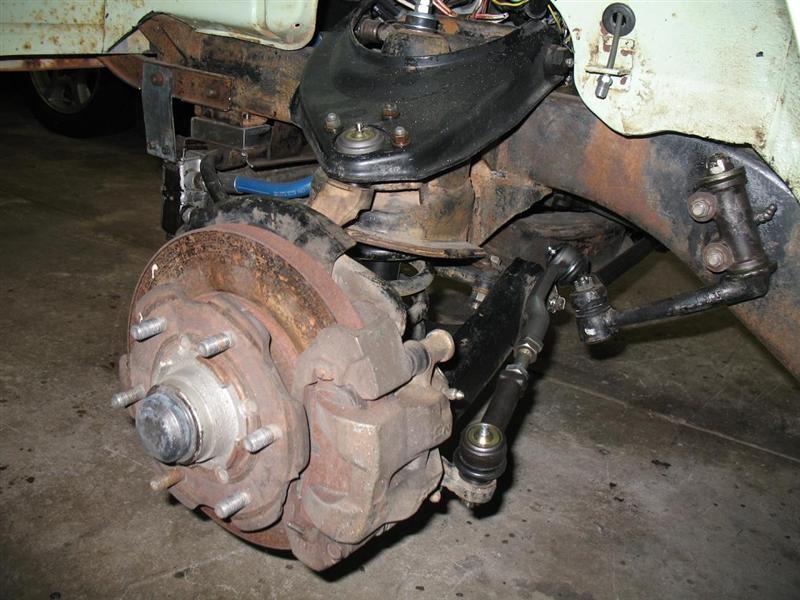
I'm moving onto the front suspension and steering now. The budget is tight to say the least, but it's a piece of work that I really want to get out of the way. I've measured up the steering box from the B2000 and I think I'll be using that one. It's 16 years younger than the B1500 one for a start and has a knuckle attachment for the steering column rather than the one piece unit originally from the B1500. So that makes it a lot easier to install. The centre link appears to be exactly the same and it's only the idler arm that will need to be changed due to the different mounting holes. Hopefully I can just swap the B1500 one onto the B2000 centre link. I will also need a new pitman arm though as the rubber boot on the old one is cracked and weathered. I will however, have to do a little modification to the steering column surround as the B2000 item is about 20mm shorter than the original B1500 one.
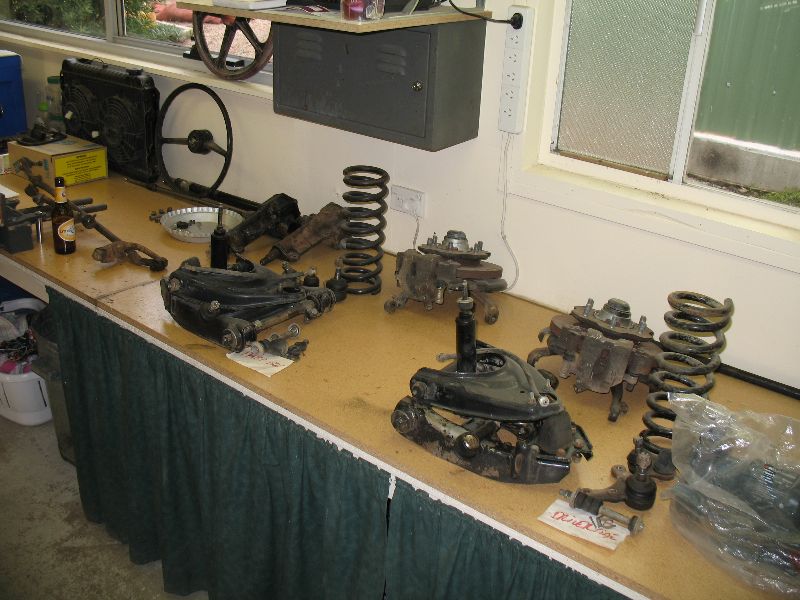
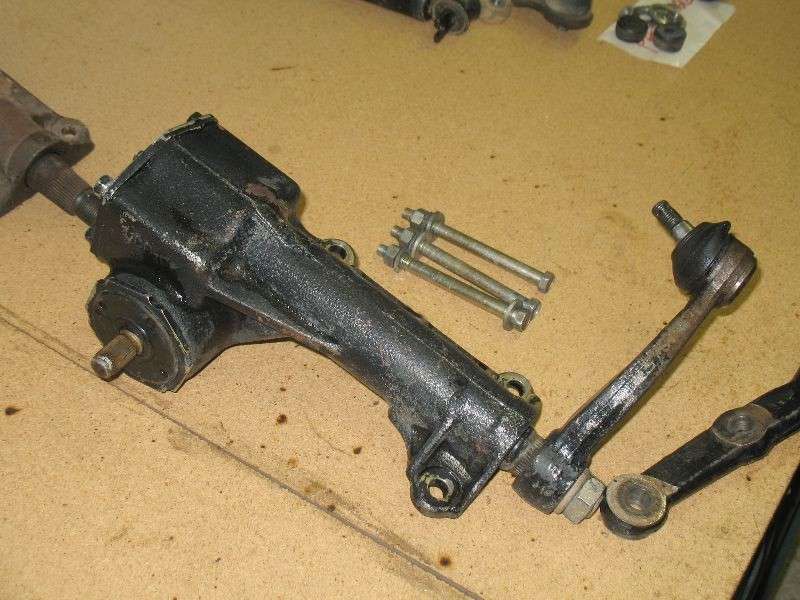
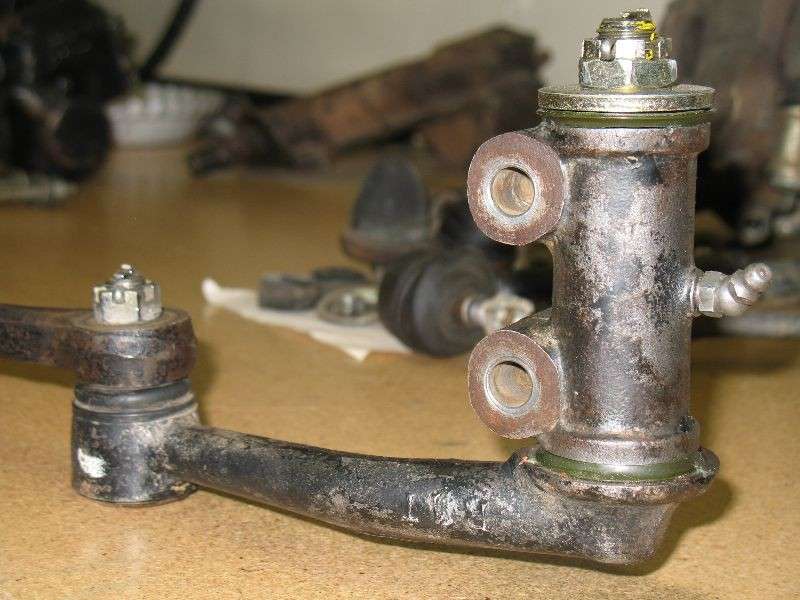
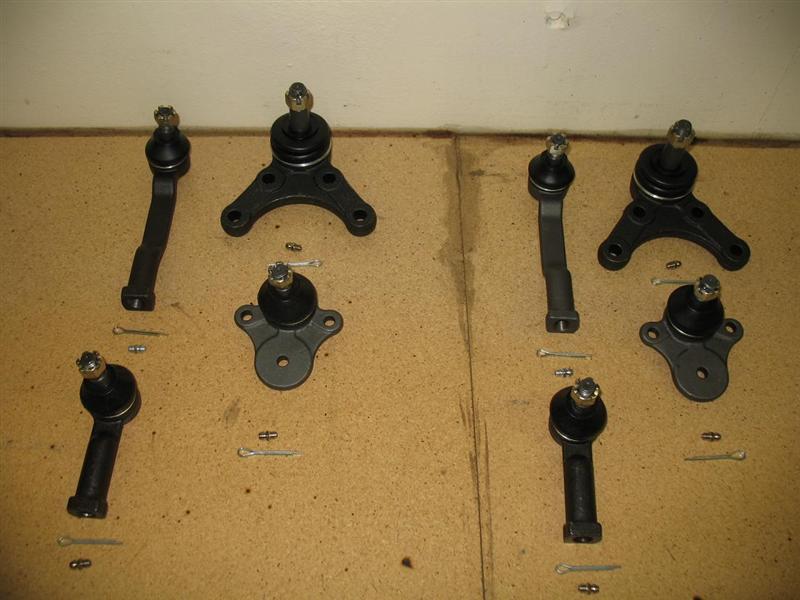
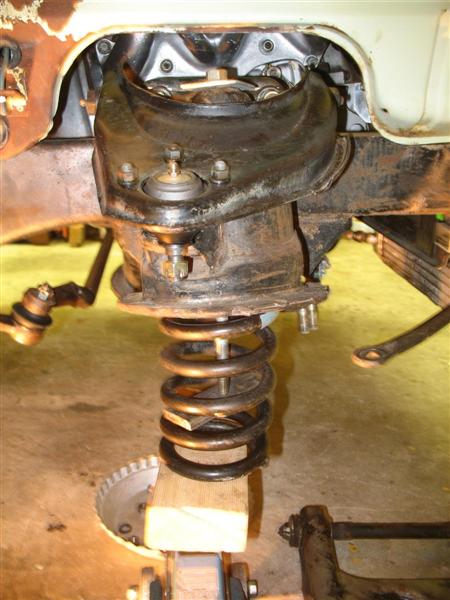
From there it will be new tie rod ends, ball joints and bushes. Here's a pic of the B2000 suspension. It's all been cleaned and now just needs the new parts for assembly.
 |
 |
Also having a few drama's with wheels/hubcaps. I had (stupidly) built my mudguards using the sunraysia's with 205 tyres and of course, the offset is a lot different then the B2000 steel rims with 195's, so they're about 30mm out. No real big problem though. I was very happy with the look of the first rear guards I made, but the strength could have been better. Nothing like re-doing things!
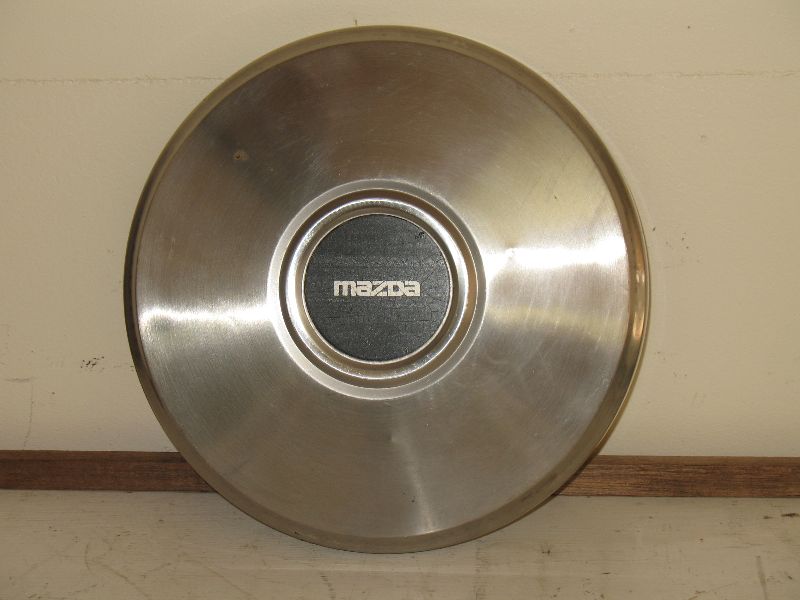
I bought 4 original B2000 hubcaps to put on the 5", 6 slot B series ute rims I had. Got them in the post, opened them up and went to put one on and they don't fit. Turns out the ridges that hold the hubcaps on are different between the 6 slot and 8 slot (4.5") rims. So the caps I have will fit the 8 slot rims (of which I only have one!), but not the 6 slots (which are the ones I really wanted to use). I'm not giving up on the original rims/hubcaps idea though. I will just have to find a set of 8 slot, 4.5" rims and start all over again. I just hope a 195 series tyre isn't too wide for a 4.5" rim. Oh, and if anyone has a spare hubcap like the one below, let me know, I need one more! (pauladrew@grapevine.com.au).
 |
 |
13 September 2008
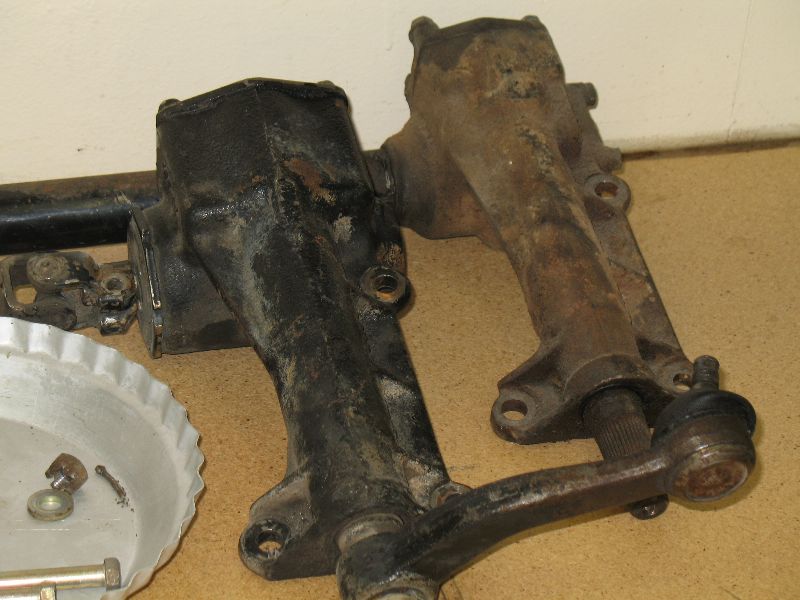
Over the past couple of weeks since the last update I have been working flat out on the steering box/steering shaft/steering column and idler arm/drag link. After spending some time measuring up to make sure that the B2000 steering box and drag link would fit, I got to work. After a good clean, the B2000 steering box itself bolted up to the original holes in the chassis and although it's a slightly bulkier unit than the original, it still has ample clearance all around it.
 |
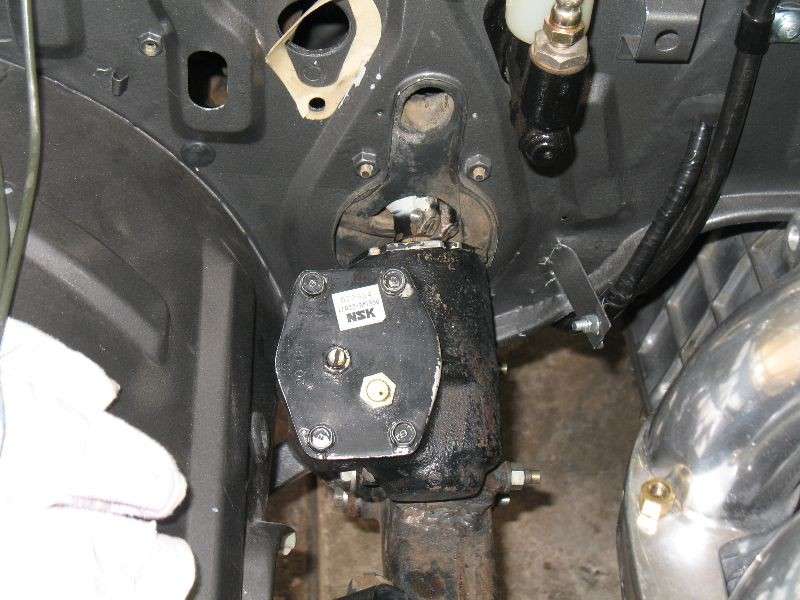 |
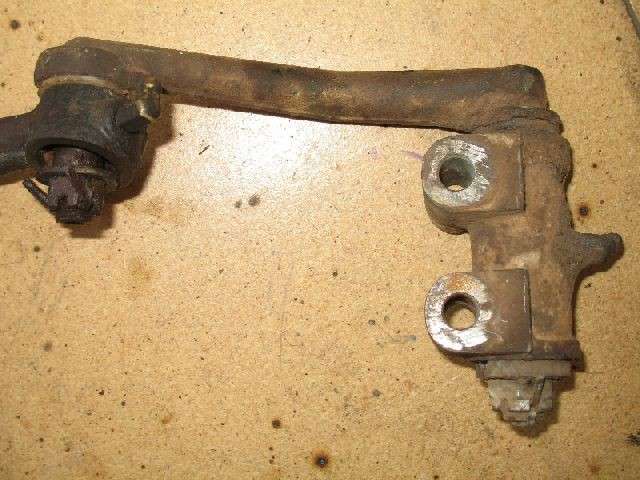
The idler arm body from the B2000 didn't fit the original holes in the chassis, so I dismantled both idler arms and cleaned up the shaft of the B2000 unit and the body of the B1500 unit. The poor old B1500 unit was a real mess! I then had to machine down the bushes from the B2000 unit as they were a little too bulky for the B1500 idler arm body to slide over the top. Once this was done, however, the old idler arm body went straight over the top and is a nice tight fit. Very happy with how that turned out and it bolted up fine.
 |
 |
 |
 |
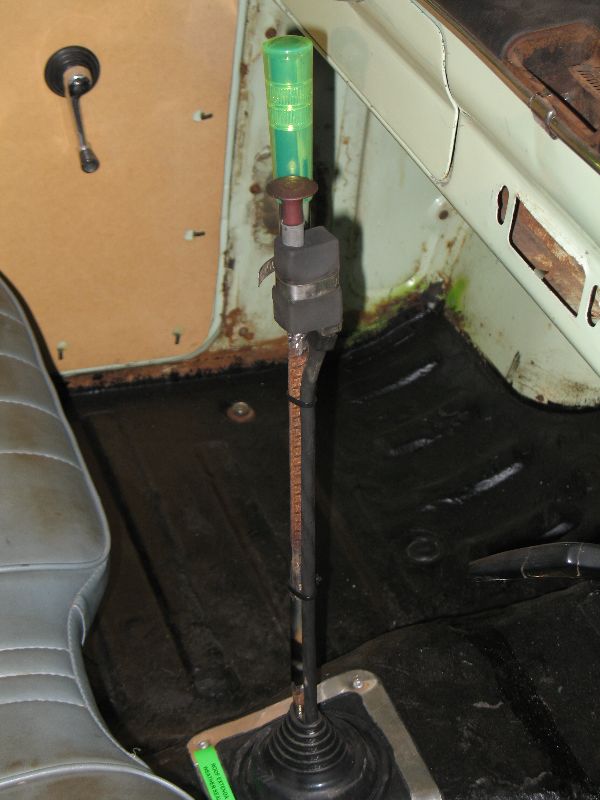
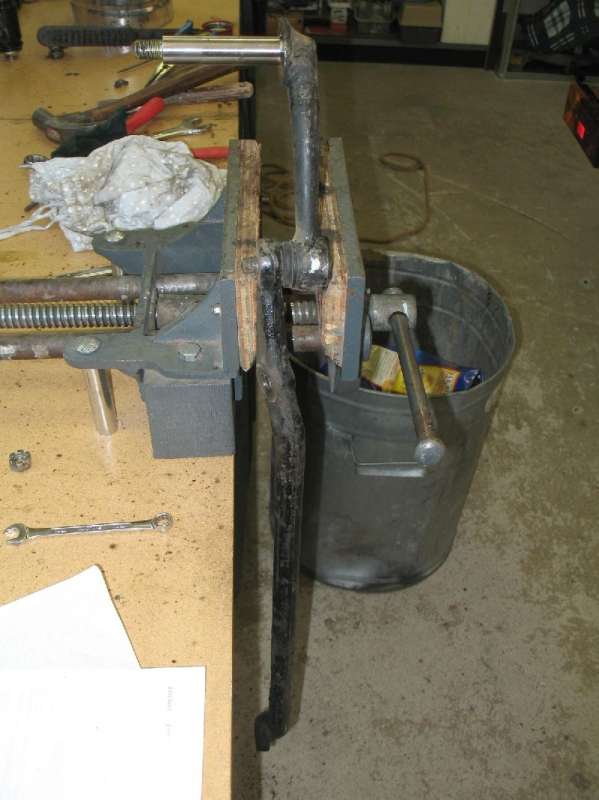
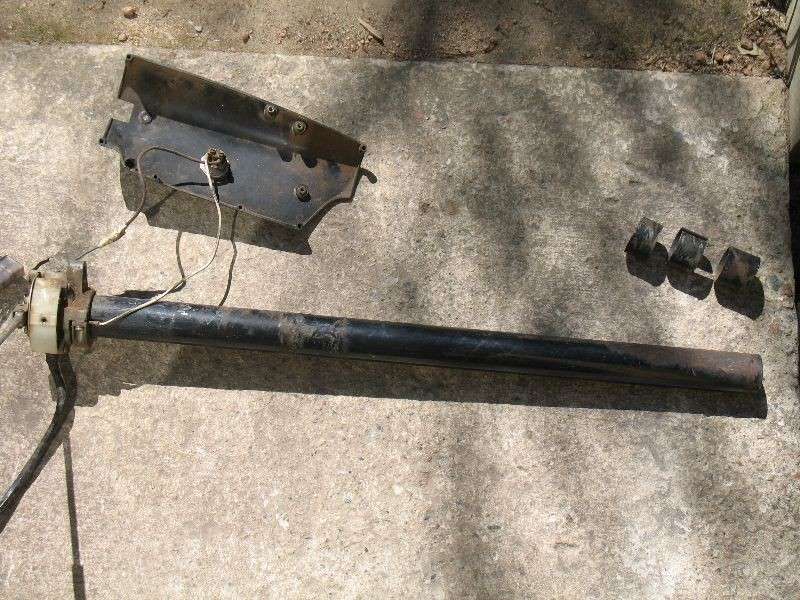
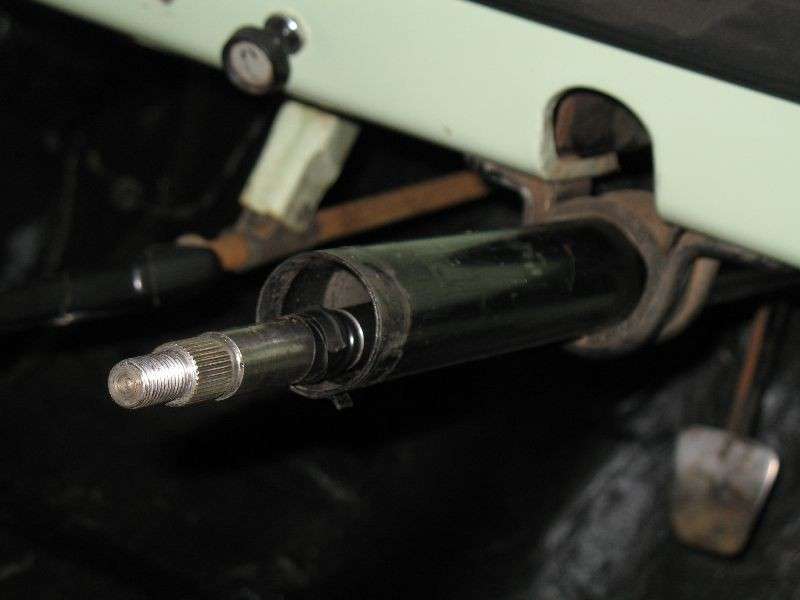
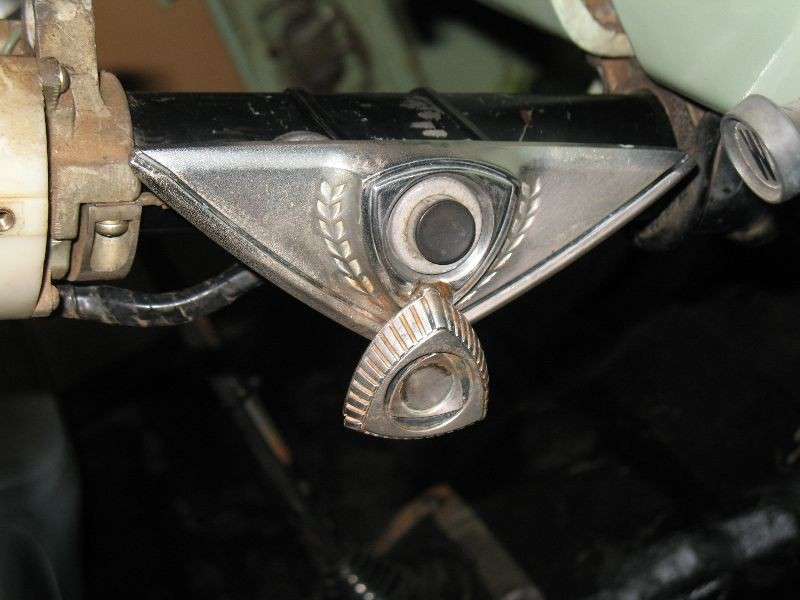
I then had some work to do with the steering shaft surround (the long black pipe that shrouds the entire length of the steering column itself). The old steering shaft is almost 20mm longer than the B2000 item and also has a different 'knuckle' type arrangement as a means of securing it to the steering box, so that meant modifying the shaft surround to fit. I ended up cutting almost 100mm out of the steering shaft column to ensure a perfect fit. I also had to make up two new bushes for the top and bottom (to keep shaft centred in the surround. The old ones just fell apart when they were pulled out). These turned out really well and with some grease the shaft turns beautifully. I'm very happy with how the mods turned out, especially as it all feels really tight and secure. Better than the tired old one that was in there!
 |
 |
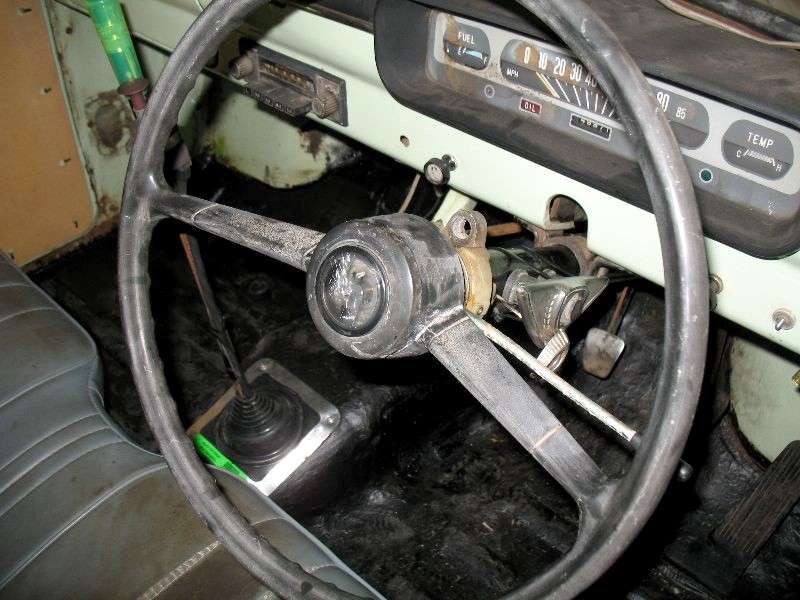 |
The last piece of the puzzle was to do something with the plastic surround for the steering column shaft. Now that everything was 20mm shorter, the plastic cover didn't fit anymore. I wouldn't have worried too much with putting it on at all, except that it houses the horn button. I didn't want to cut the plastic cover, so I put it aside and went looking for something that could house my horn button. A quick scan of the shed and I was holding an RX4 boot key surround with the little flip down rotor on it. As pure luck would have it, the horn button fitted 100% perfectly in the keyhole. Put the securing nut on the back and I now had a horn button surround with a difference! The flip down rotor doesn't flip up to cover the button as it sticks out a couple of mm too much, but that's ok, I think it still looks great. So I now don't have a plastic cover over the blinker block etc, and you can clearly see the steering shaft surround, but I think it goes really well with the whole basic rat rod theme.
 |
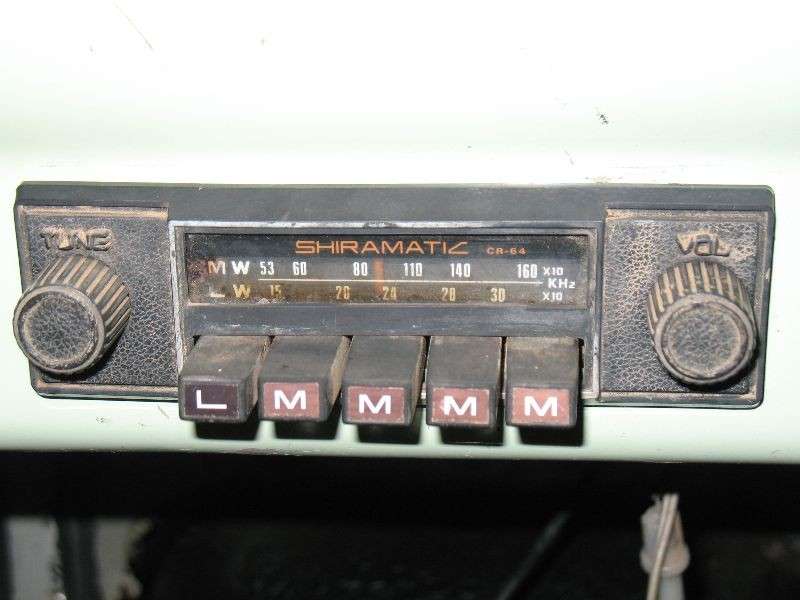
Last of all for the week was the quick reinstallation of the ute's radio. For some reason, I took it out of the old ute about 3 or 4 years ago when she was still sitting in the paddock on the farm, and had it sitting in the cupboard. I have no idea if it works and have no intention of hooking it up, I just wanted something to fill in the hole. In fact, the old knobs on the radio are all stripped out, so I simply superglue'd them on for aesthetic's sake. Who needs a radio when you've got the sound of a bridgeport anyway?!
 |
I've just ordered new upper and lower ball joints and inner and outer tie rod ends from the US (cheaper), so as soon as they arrive, they'll be going in and then the front end will be finished. It was a job I honestly thought might take me longer, but I've been lucky enough to strike no problems (thus far anyway) and I've done it much quicker than anticipated. In fact, with the exception of finishing off the wiring in the engine bay (that will be sorted one day soon, I promise!), the completion of the front suspension will see all the 'major' jobs completed. From then on, it's just lots of little stuff to finish it all off. I'm still giving myself plenty of time though. My new self-imposed completion date is the 31 July 2009. That gives me over 10 months to have it finished. It's first major outing will be the Cooma Motorfest in November 2009, so I've also given myself approximately 3 months for testing, engineer/rego inspections and to fix any issue arising from those inspections. Feeling really good about the whole thing!
29 September 2008
Have pretty much been concentrating on getting this front end back in and I now seem have to have it all sorted. New tie rod ends, ball joints and gas shocks are in. I chose to go with the original B2000 springs for the moment until I can see what ride height I'm after. So far though, it looks to be pretty good. I've got about 150mm clearance from ground to the bottom of the oil cooler, so that satisifies legal requirements (min. 100mm) as well as the ute being reasonably low. I now have to procure some rims to take my B2000 hubcaps and then once they're painted, new tyres can go on and the front end will be done.
 |
 |
 |
 |
 |
 |
I also have to either buy or get made a new nylon bush to go around the steering shaft. I made a heavy duty rubber one which works beautifully, but when the steering wheel is turned, it makes a slight squeak sound as the metal turns in the rubber.