
Towrota by Drew | page 7 |
| < | 1 | 2 | 3 | 4 | 5 | 6 | 7 | 8 | 9 | > |
10 October 2008
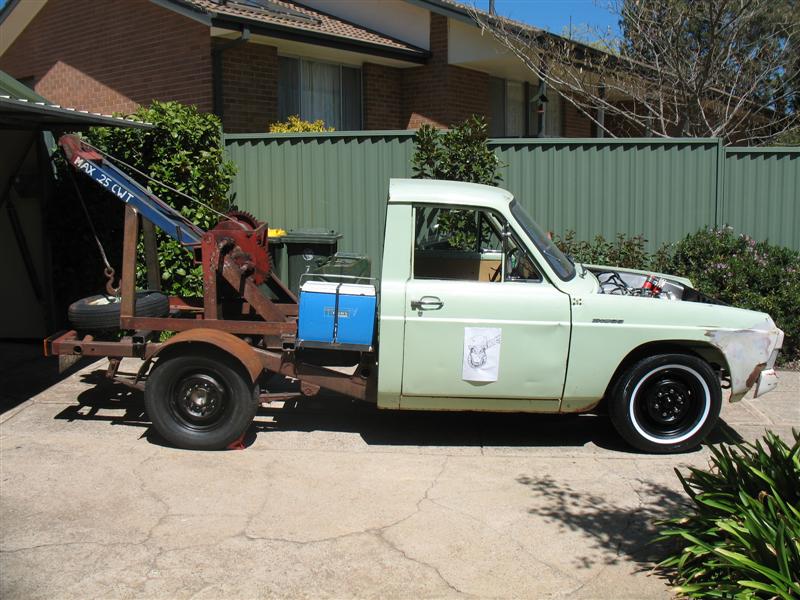
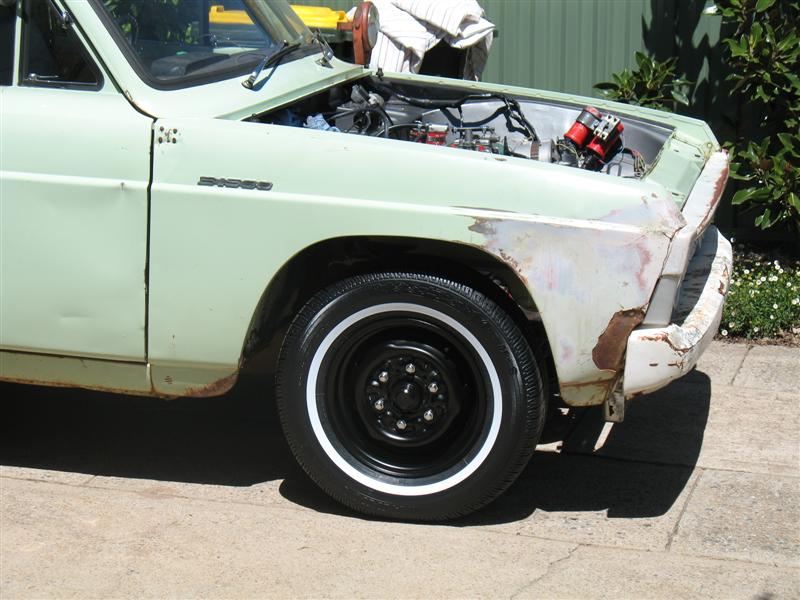
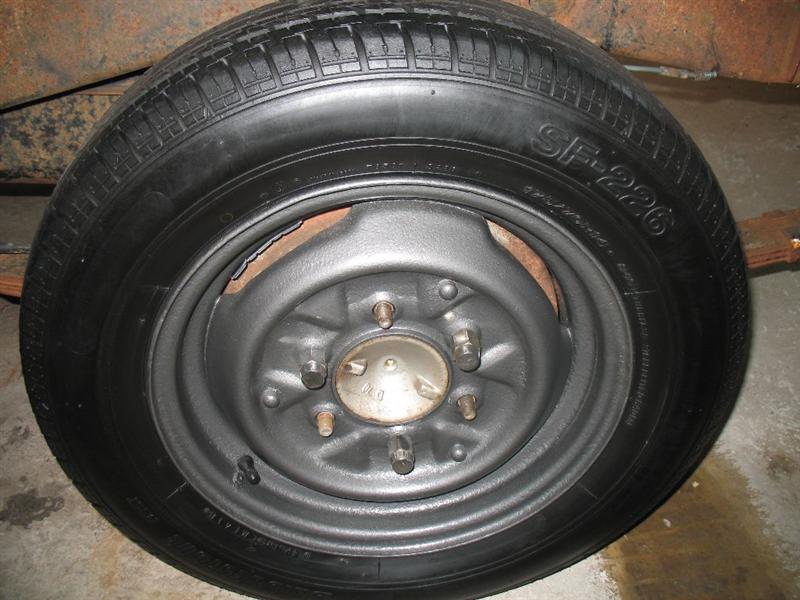
Due to the hubcaps I bought not fitting the 5" standards rims I've got (they will fit the 4.5", but not the 5", grr!), I had to rethink my wheel setup. I settled on a simpler idea which blends in better with the 'old rod' type feel of it all. I started out by sanding the 5" rims back, undercoating them and then spraying them satin black. I bought two new whitewalls for the front (will do rear later) and had them put on. They are 195/75/14 whitewalls with a 20mm band. I then used short, closed-end chrome wheel nuts and painted the front centre hubs the same satin black.
End result is a mass of deep, rich black highlighted by the chrome wheel nuts and sparkling whitewall. In theory I wasn't sure how it would look, but now they're on, they compliment the light green paintwork beautifully. Very, very pleased with the end look. (If you're looking for well priced, good quality whitewalls in the ACT, give me a yell and I'll tell you who to go to). Hope you like the look of them as much as I do!!
 |
 |
 |
12 November 2008
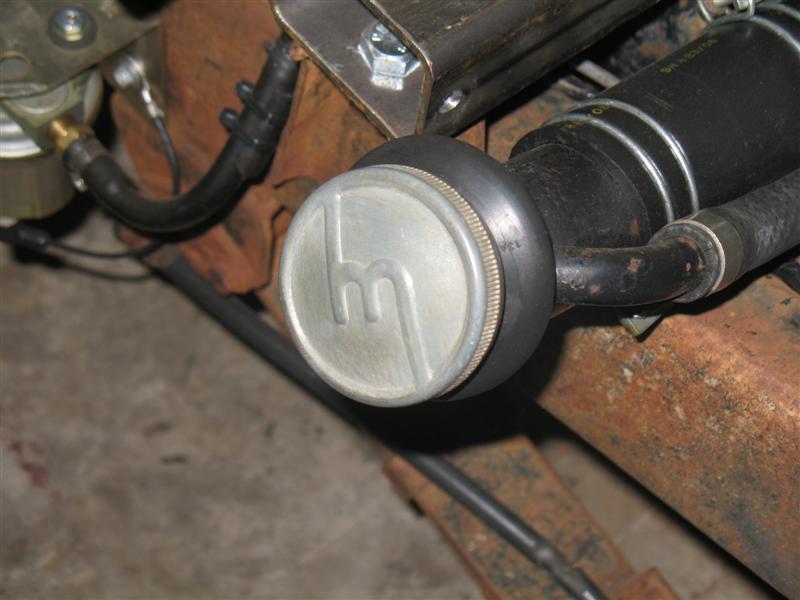
A chap in our club has a ute similar to my B1500. It's a rotorised B1600 and posesses a real tough rat look. As spares for his B1600, he bought another non-running B1600 several years ago. Having a clean up about the place, he decided to get rid of the spares ute and so gave me a call to see if I wanted it. Did i?! The princely sum of $100 exchanged hands and I am now the proud owner of Mazda number 5. A 1976 B1600 ute. It's pretty rough, but has a very good body and no real rust that I can see. So far, I've scored an original floor mat, the original fuel filler cap with the old style 'M' on it and a clearer idea of where my seat belts need to be mounted in the B1500. Worth every cent so far!
Original plans were to get it home, strip everything out (and I mean EVERYTHING!) and then send the cab/chassis to the scrappers. Having had a decent chance to look at it last night though, I think it's too good for that. I can find virtually no rust, it has excellent hanging panels and the floors are good too. Might be a good idea to hang onto a complete cab in good nick. Once I've gotten what I need, I'll be taking it to the farm to sit next to the Capella and the 1000 ute.
I'm not buying any more Mazda's! No, really!!!
.jpg) |
.jpg) |
.jpg) |
.jpg) |
.jpg) |
.jpg) |
20 December 2008
Progress on the ute lately has been patchy, although reasonable productive. Having been sick for a few weeks and not feeling like getting out of bed, let alone working on the ute, things have slowed down a little. Fear not though, the last few days have brought on a flurry of extremely promising activity!
Since the last update, I've done the following:
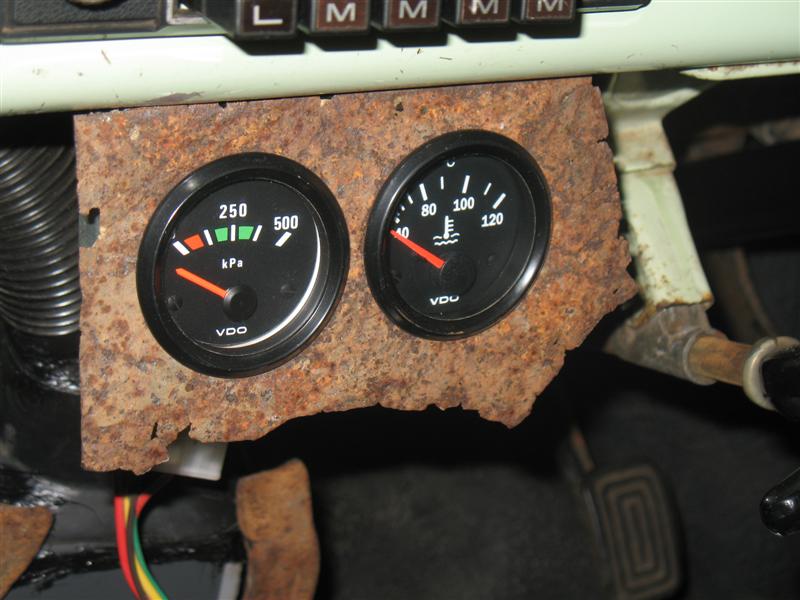
* Installed a set of good secondhand gauges (water temp and oil pressure) sourced from a club member
* After three previous attempts, I finally succeeded in fabricating a new throttle cable/accelarator pedal assembly.
I used the original unit off the spares B1600 and then cut it down, drilled new holes in the B1500 and made it all
fit. Looks very good and seems to function perfectly
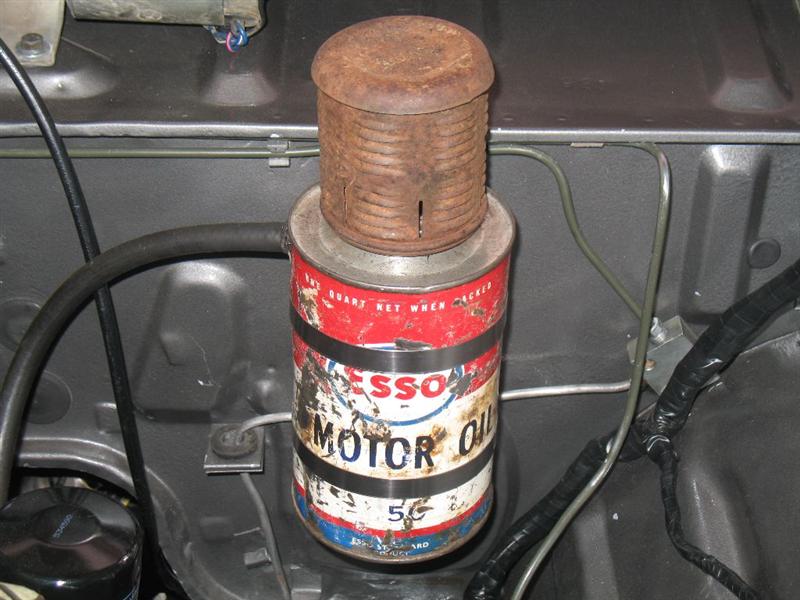
* Installed a new 'breathable' top on my catch can (came from a vintage car)
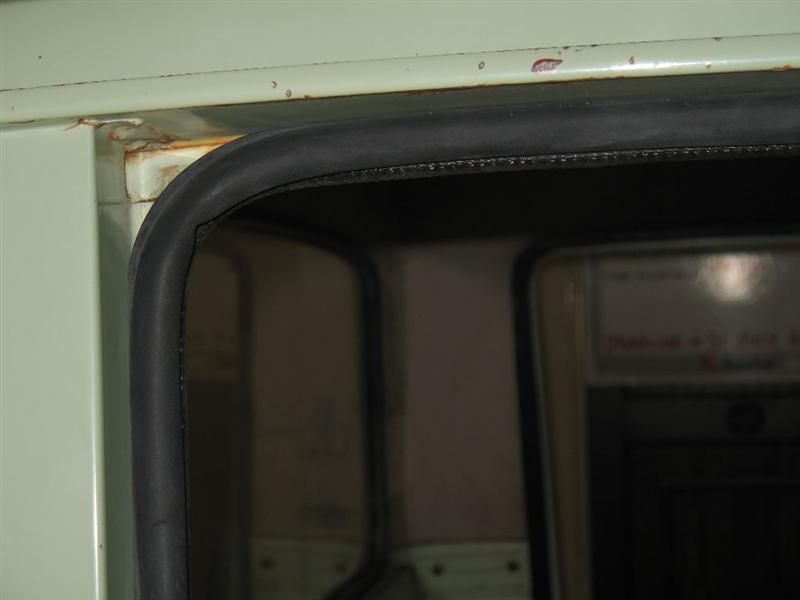
* Put new door rubbers in
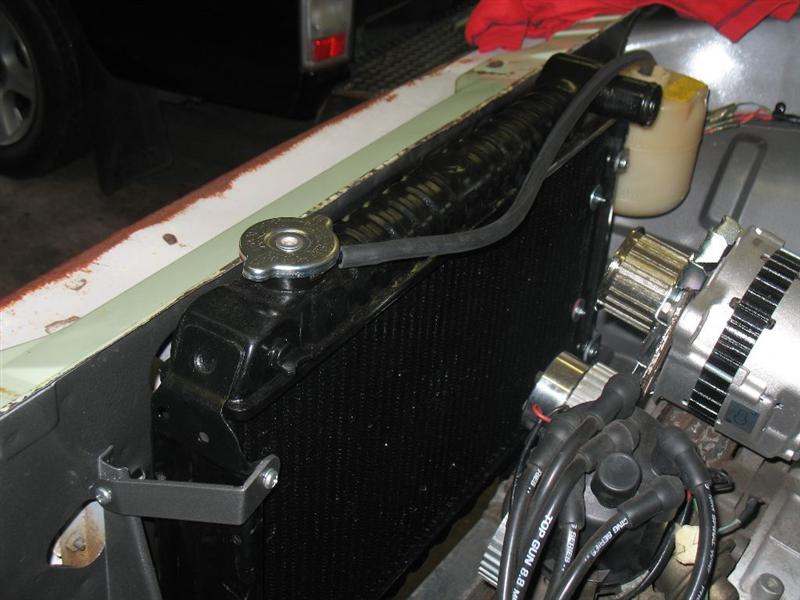
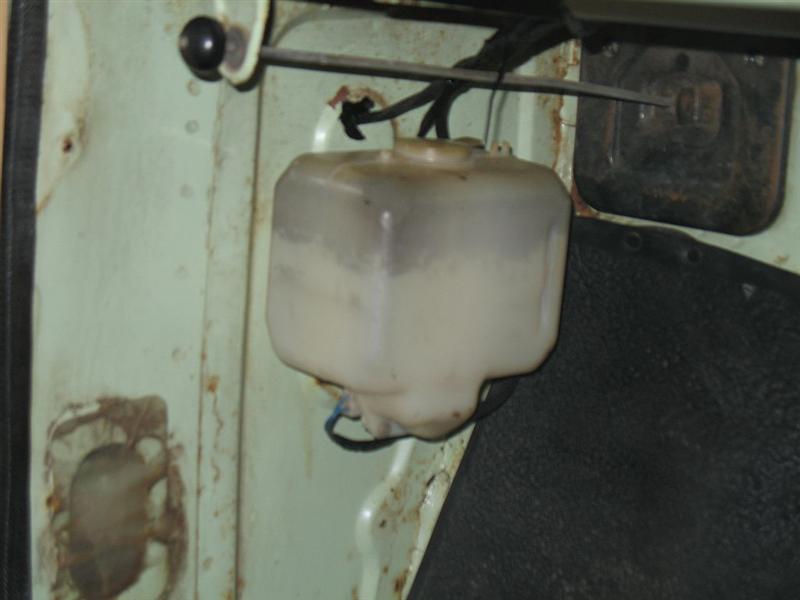
* Had my radiator reconditioned and then fitted it with the custom brackets I'd made and then fitted the overflow
bottle (original Mazda one)
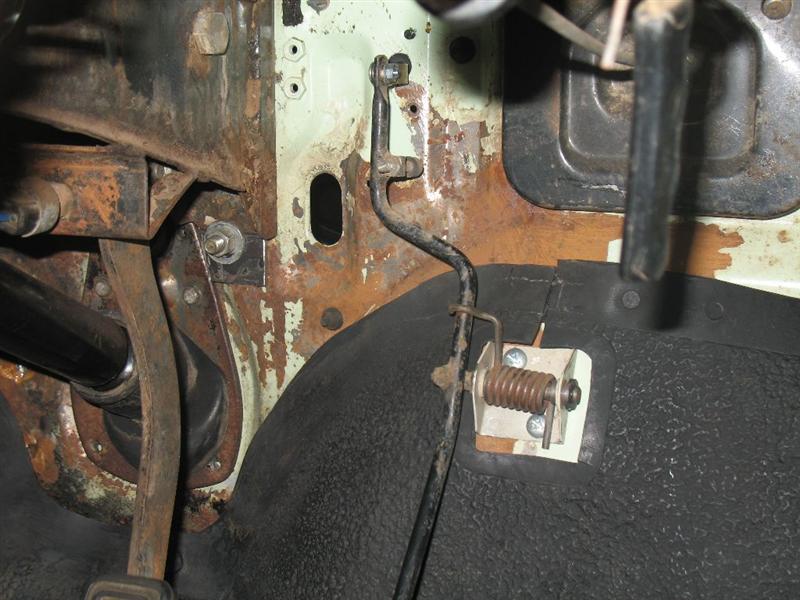
* Figured out where my seatbelts need to go using the spares B1600 as a guide and drilled mounting holes accordingly
(and sourced the correct numbers for new belts)
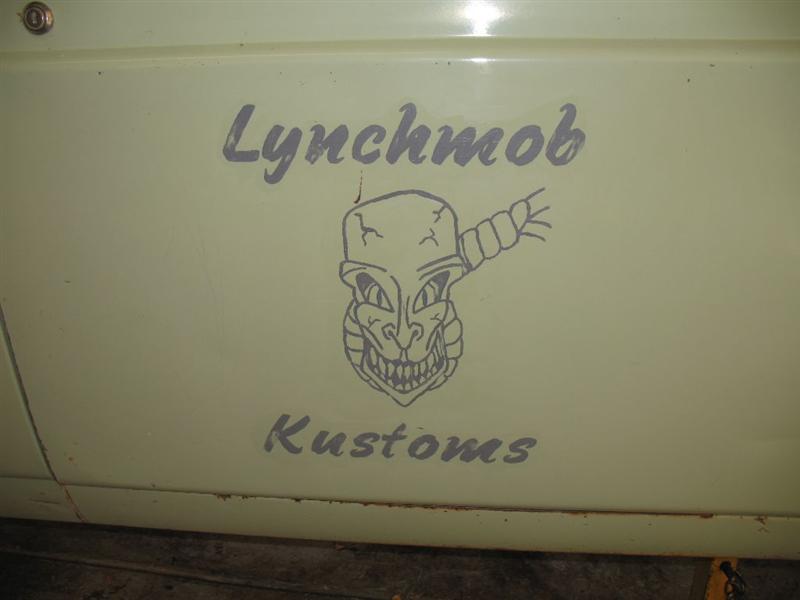
* Completed my custom graphics on the doors
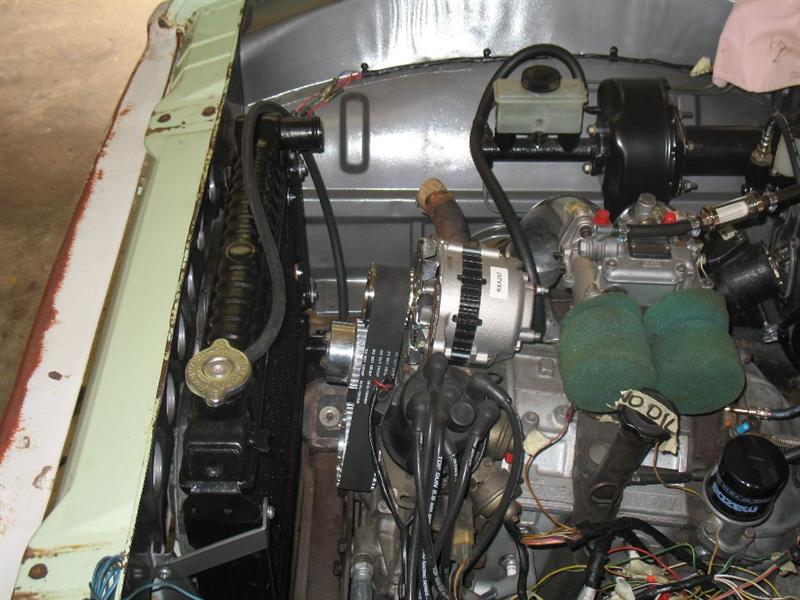
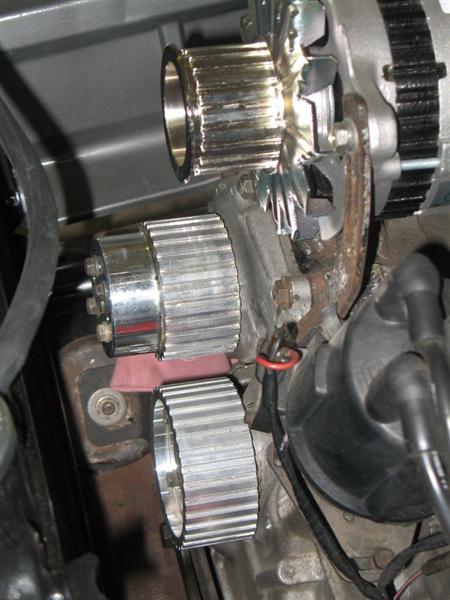
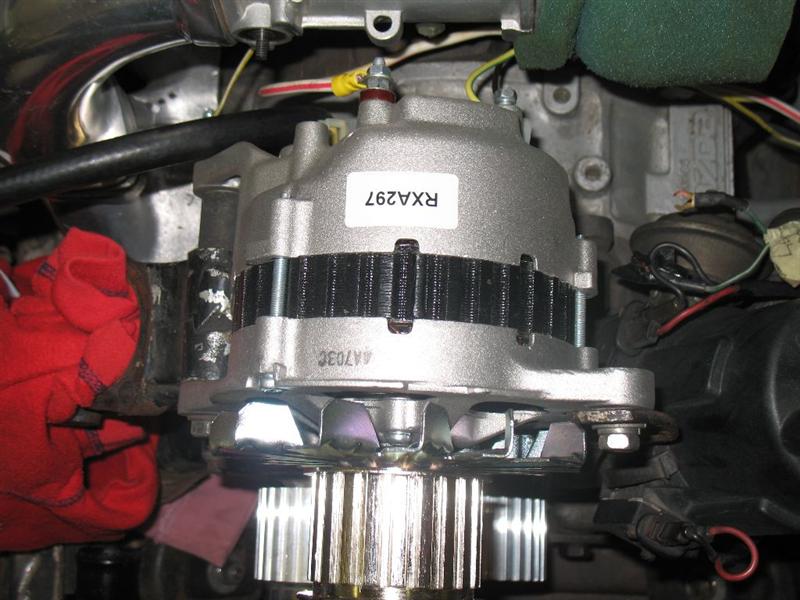
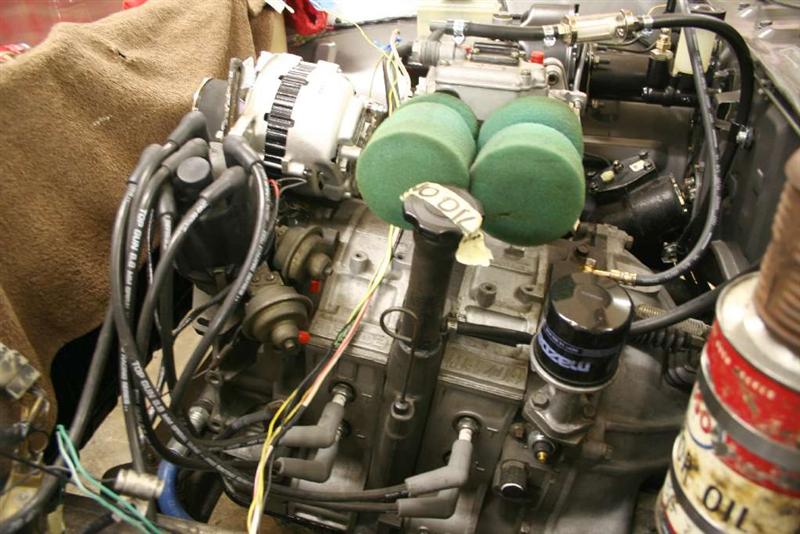
* Bought and fitted a gilmer drive setup
* Painted the rear 5 inch rims satin black and had two new whitewalls fitted to match the front (all 4 aren't on the
ute yet, don't want to mess them up!)
* Fitted the windscreen wiper washer bottle and sprayhead from the B2000 spares ute
* Installed a 300W demister and made ductwork to fit the existing dash vents in the ute (I'm still a little dubious
as to whether this unit will have enough 'oomph', but I'll give it a try)
* Sprayed two old rims I had and mounted them with some almost new 175/75/14's I'd been given a while ago. Handy to
have a couple of spares to move the ute around the shed
* Finished the little bit of work needed to complete the steering column/wheel setup
* Fitted the floor mat from the B1600; and
* Bought and fitted a new internal reg alternator. Phew!!
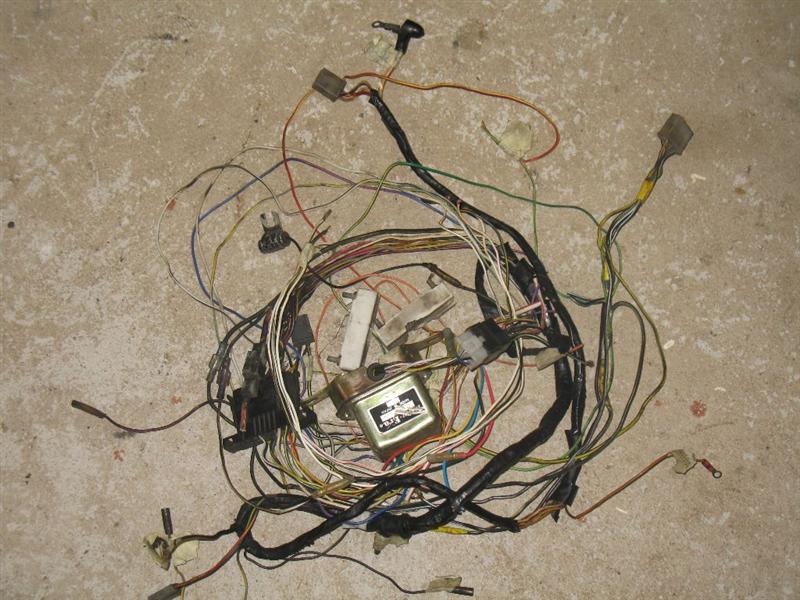
The most exciting part of all though is, sorting out the wiring in the engine bay is finally underway. My next door neighbour is a fantastic mechanic and really knows his stuff. He'd offered to help some time ago, but of course time slips away very easily. Last night however, we finally got organised and got started. After a few hours, we'd sorted out the alternator wires, done lots of little tests all over the place and figured out what was happening with the coil wires. We also removed a mass of surplus wires (like, a LOT!). It's really good to get it back to basics and have no other wires than the necessary ones hanging around. I was extremely pleased with the progress and it's a real possibility that with a few hours more work, it will actually be ready to fire! To make that happen however, I've got a list a page long of things that need to be done first.
Anyway, now that things are moving again, hopefully the next update won't take so long.
 |
 |
 |
 |
 |
 |
 |
 |
 |
 |
 |
 |
 |
 |
 |
5 February 2009
Just a small update on what's been happening over the past month or so. The wiring is continuing, albeit a little slower than planned. That's ok though, there's enough to keep me going with other little things to be done. Since the last update, here's what's been done.
* Completely remade the rear mudguards. I wasn't happy with the old ones, so pulled them apart and saved the guard itself
and tossed the frame and started again. New stronger frames with additional bracing and much better saddles onto the axle
housing have made these new guards MUCH stronger. Very happy with them this time 'round.
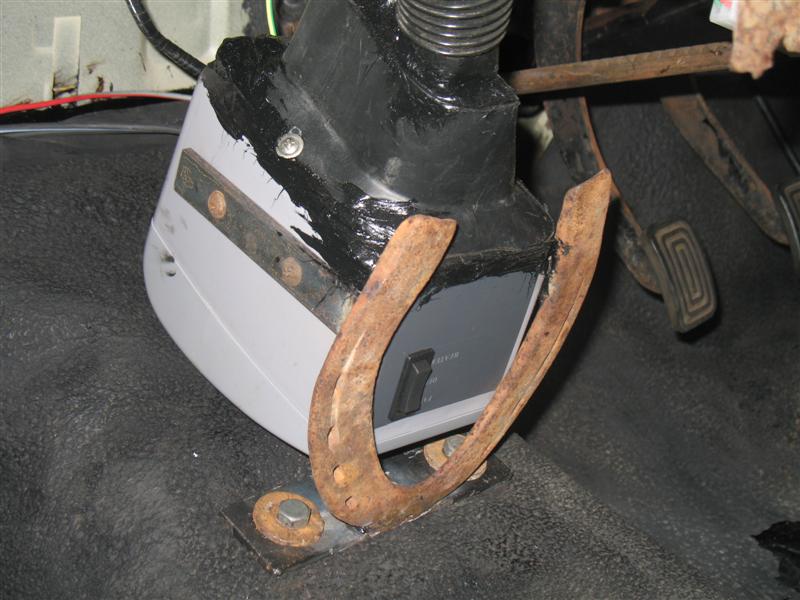
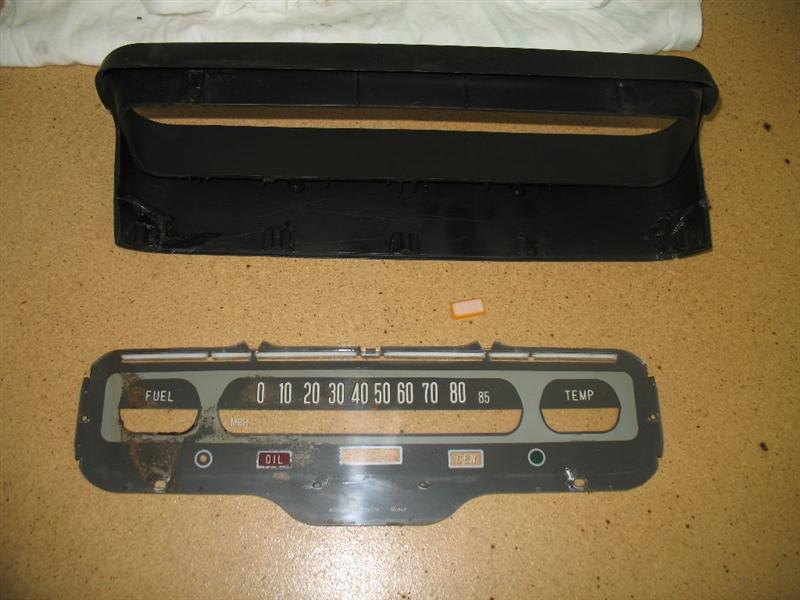
* The dash binnacle is out while we sort out the wiring, so it looks a bit of a mess at the moment. Should be able to go back in soon.
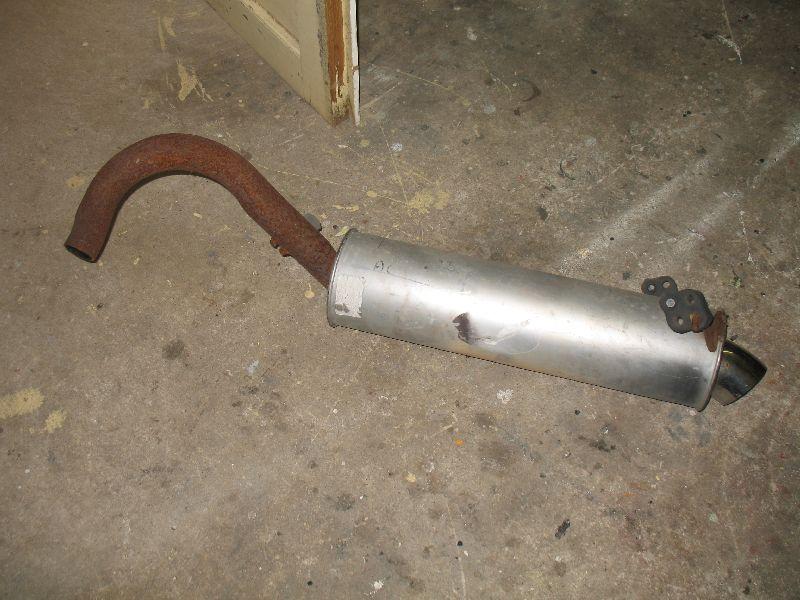
* I was given a nice big truck muffler from a S3 RX7, so with a coat of matt black paint, hopefully I should be able to use
it. Should look great exiting from behind the drivers door.
Things have been a little slower due to the lack of funds. As with any project (I'm guessing), there comes a point where you can no longer fabricate your own part or barter with someone in your car club to keep the costs down. Final things like exhaust systems, new seat belts, engineer and of course rego and insurance all need substantial wads of cash. Just as I was reaching desperation point, my wife gave me a considerable amount of cash for my birthday. This now means I can well and truly get back into the build and get on with it.
I've ordered some new seat belts and the tailshaft has been sent off for cutting/shutting and balancing. Once they're in, hopefully the motor will be ready to fire and I can get it on a tilt tray and get it to an exhaust shop.
My deadline of July 31 is loomer ever closer, but if I can get through the next couple of months and make some serious progress, I hopefully should be on track. Keep an eye out for the next update, it should be a beauty!!
.jpg) |
.jpg) |
.jpg) |
.jpg) |
.jpg) |
 |
 |
.jpg) |
.jpg) |
 |
 |